How To DIY This Parisian Style Wall Panelling
I am aware that this is the third blog post that I have written on DIYing wall panelling in my home, but with each new panelling project I take on I learn something new that I feel is worthy of sharing, so forgive me for the repetitive nature of this topic! In my defence, wall panelling is also having somewhat of a resurgence in home improvement trends for 2020. The reason? It is budget-friendly, easy to do (with a decent amount of patience) and an effective way to decorate your walls, creating visual interest that also adds value to the home without having to wallpaper.

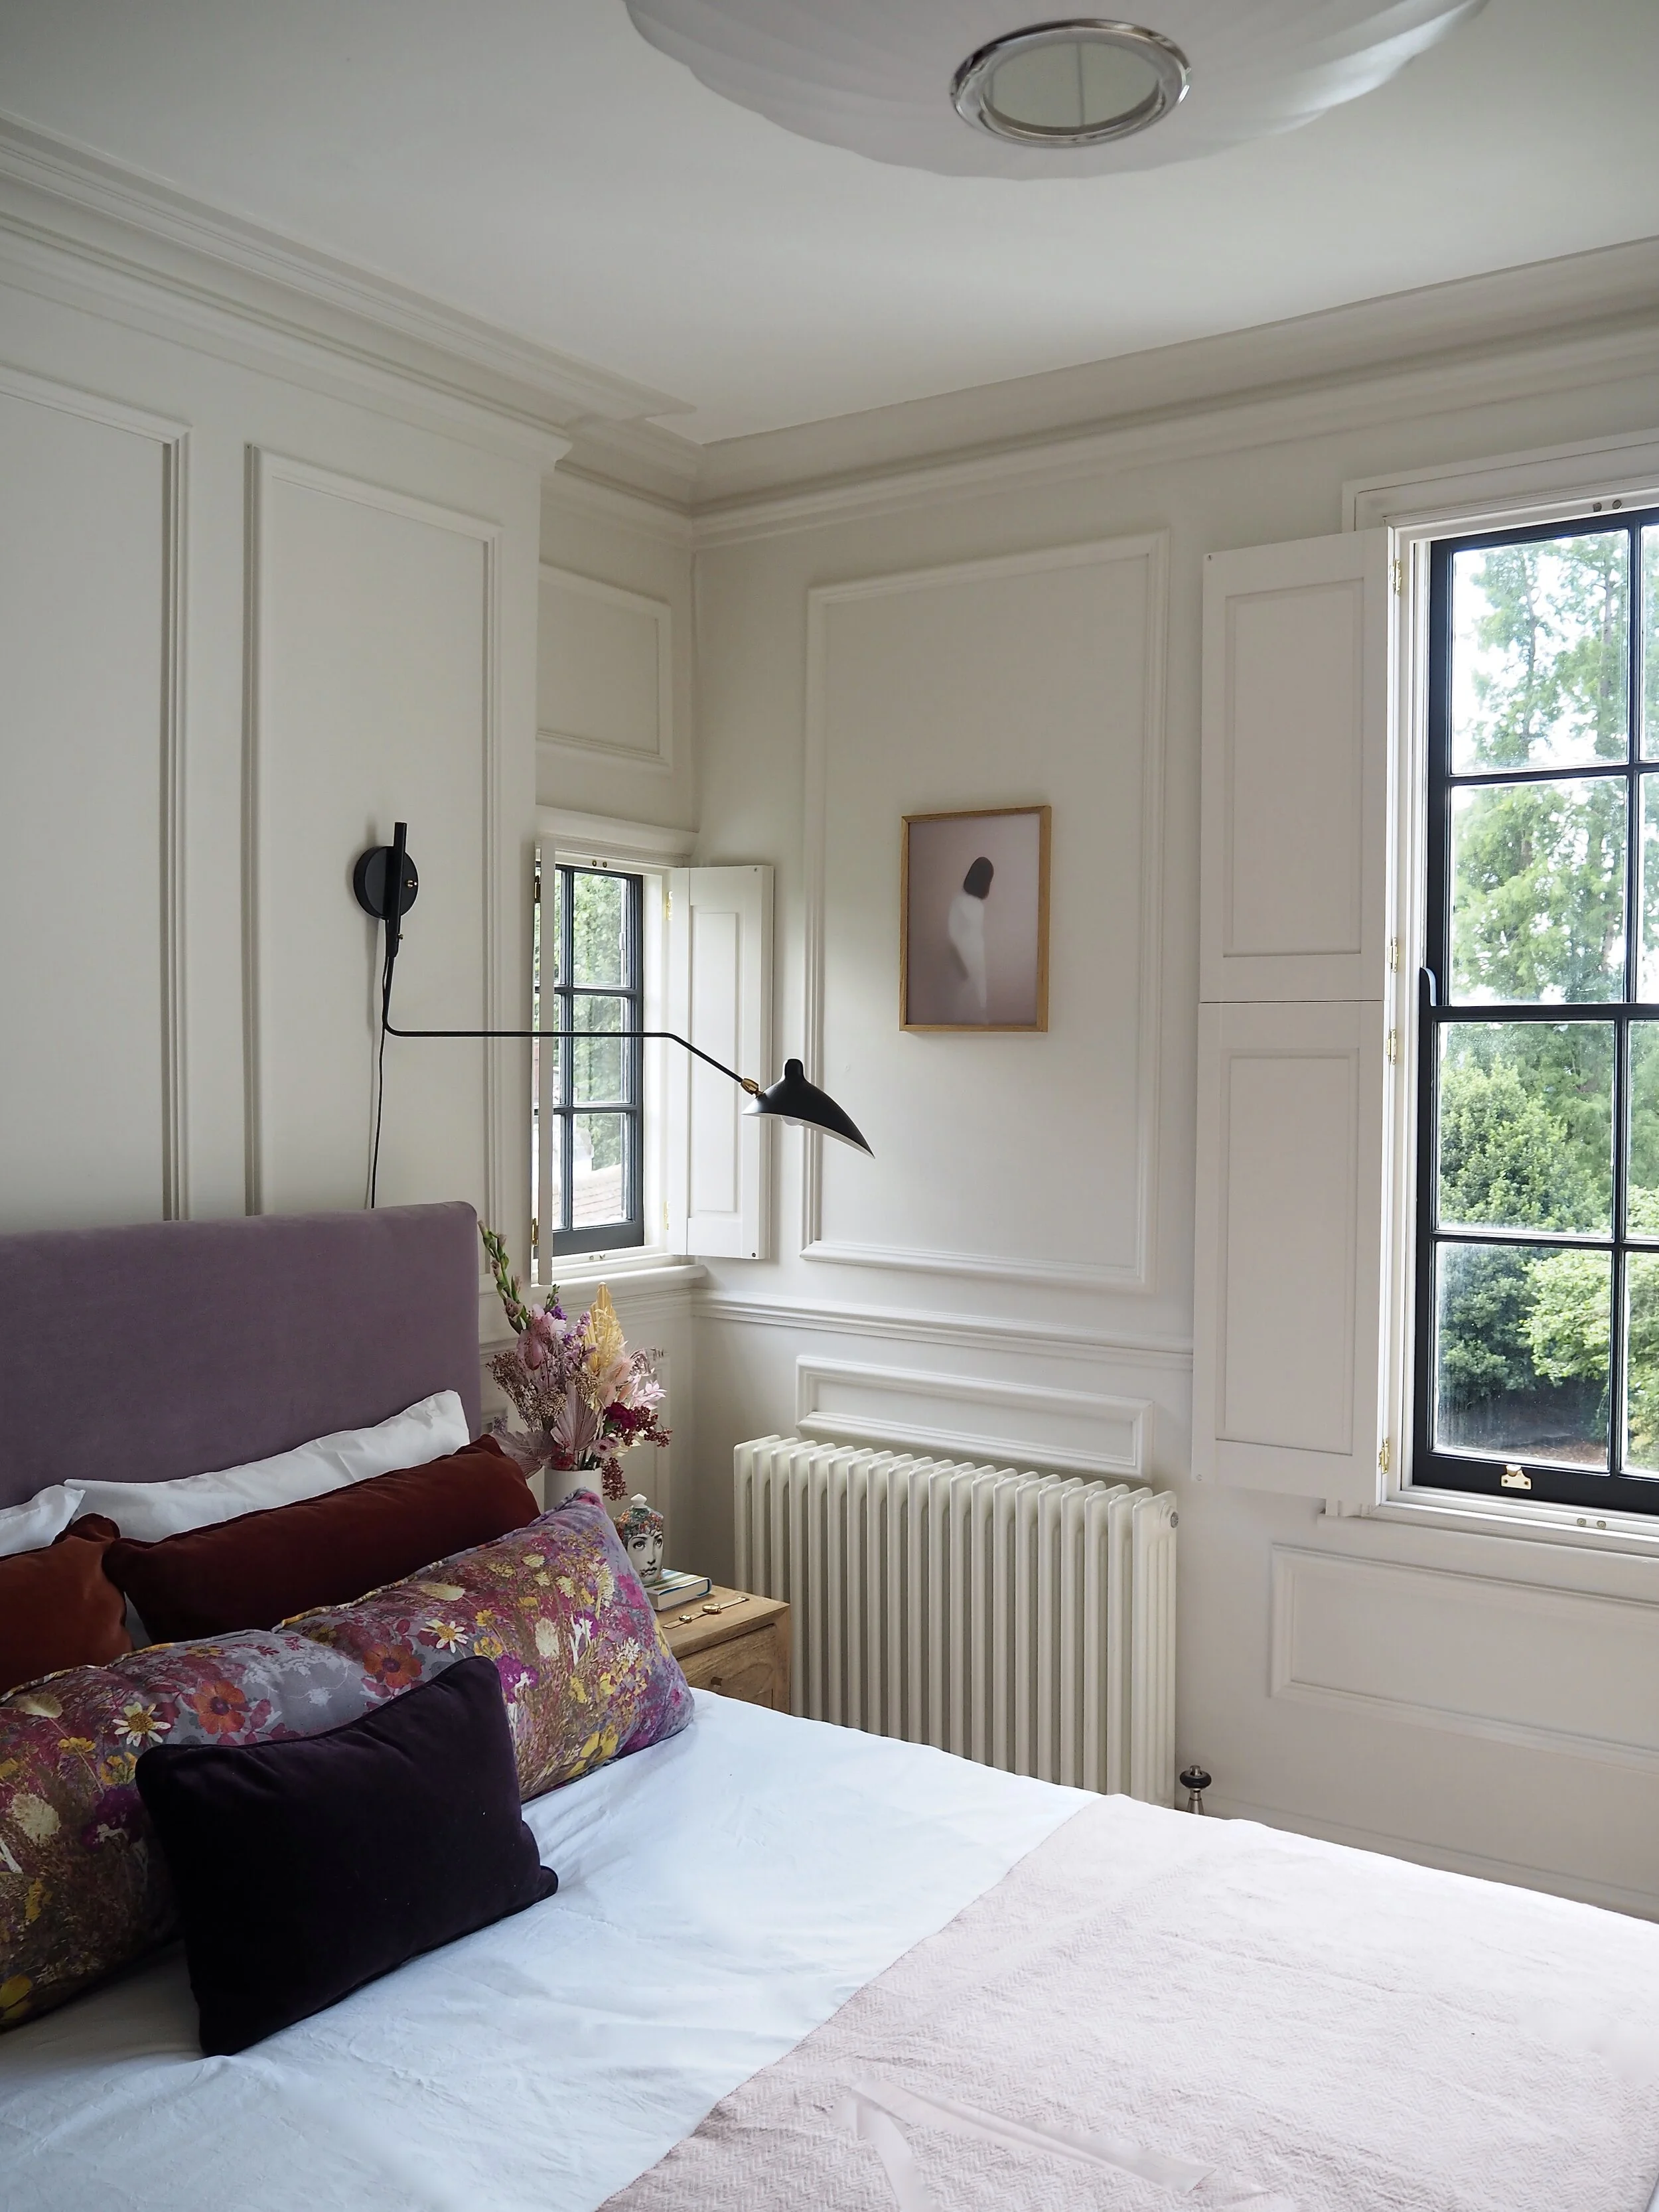
My bedroom at home with DIY Parisian style wall panelling.
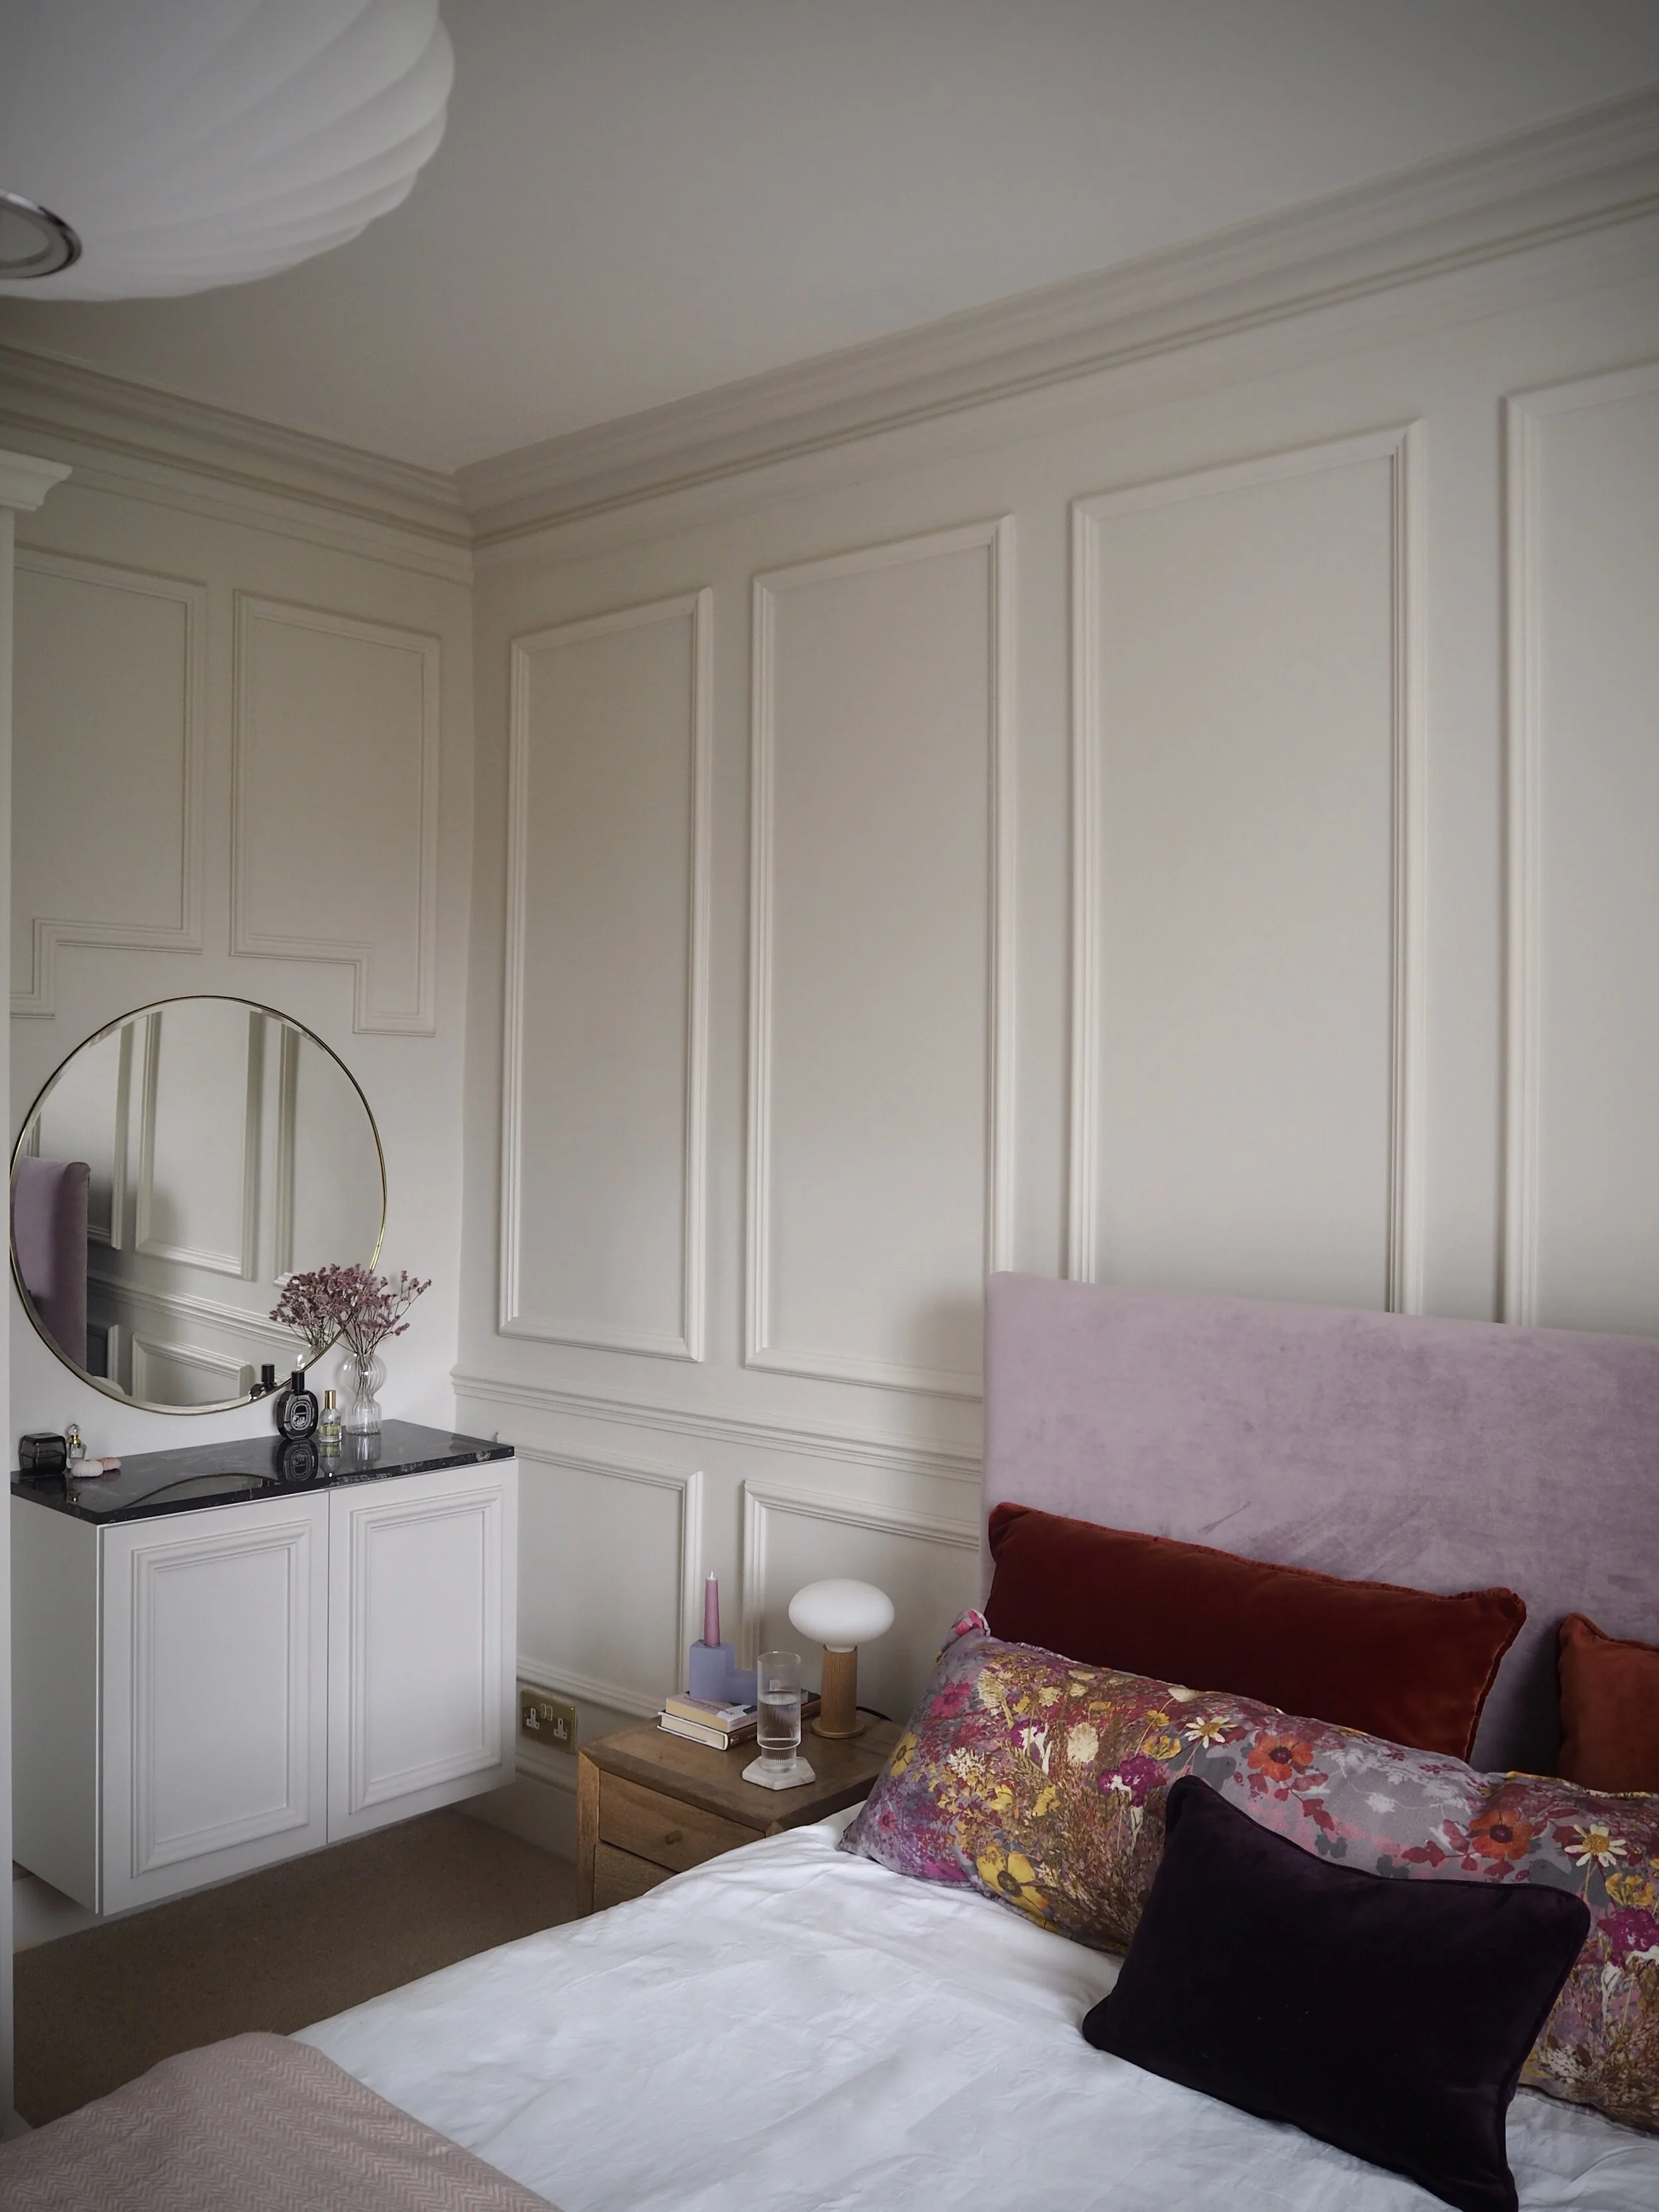
My bedroom was one of the rooms in my home that I just couldn’t get right. The walls painted all one colour felt cold and bland. Wallpaper felt too ‘busy’ in what should be a calming space. So, when I came to decorate this room again, I decided that adding in some Parisian style wall panelling would give me the subtle and understated decorative detail that I craved.
Rather than having the more slender panelling that I put in my living room, this time I wanted really chunky, dramatic panels split between a central chair rail that really grabbed attention. Unable to find what I was looking for in the usual beading and moulding section of the DIY store, I investigated into polymer moulding which looks like plaster but is really lightweight (making it easier to apply) and comes pre-primed. Even though polymer generally works out a bit more expensive than beading strips I found a really great multipack option in Screwfix that was budget-friendly.
YOU WILL NEED:
To create this wall panelling in my bedroom I used the following:
Packs of polymer strips from Screwfix
Central MDF rail from Wickes
Ultimate Instant Grab adhesive from Wickes
Pencil
Sandpaper (120 grit)
Simple set square and protractor
Good quality caulk
Caulking gun
If you are panelling a very small space then you can use a manual mitre box and a handsaw. However, I highly recommend investing in this compact electric mitre saw which makes the job much easier!

Step 1: Work out the height of your central dado chair rail
The first piece of the puzzle is to work out where you are going to place the central dado rail that separates the decorative panels. You need to make sure that it can be applied at the same height across the whole of the room without encountering multiple problem areas like radiators or lots of switches or sockets.
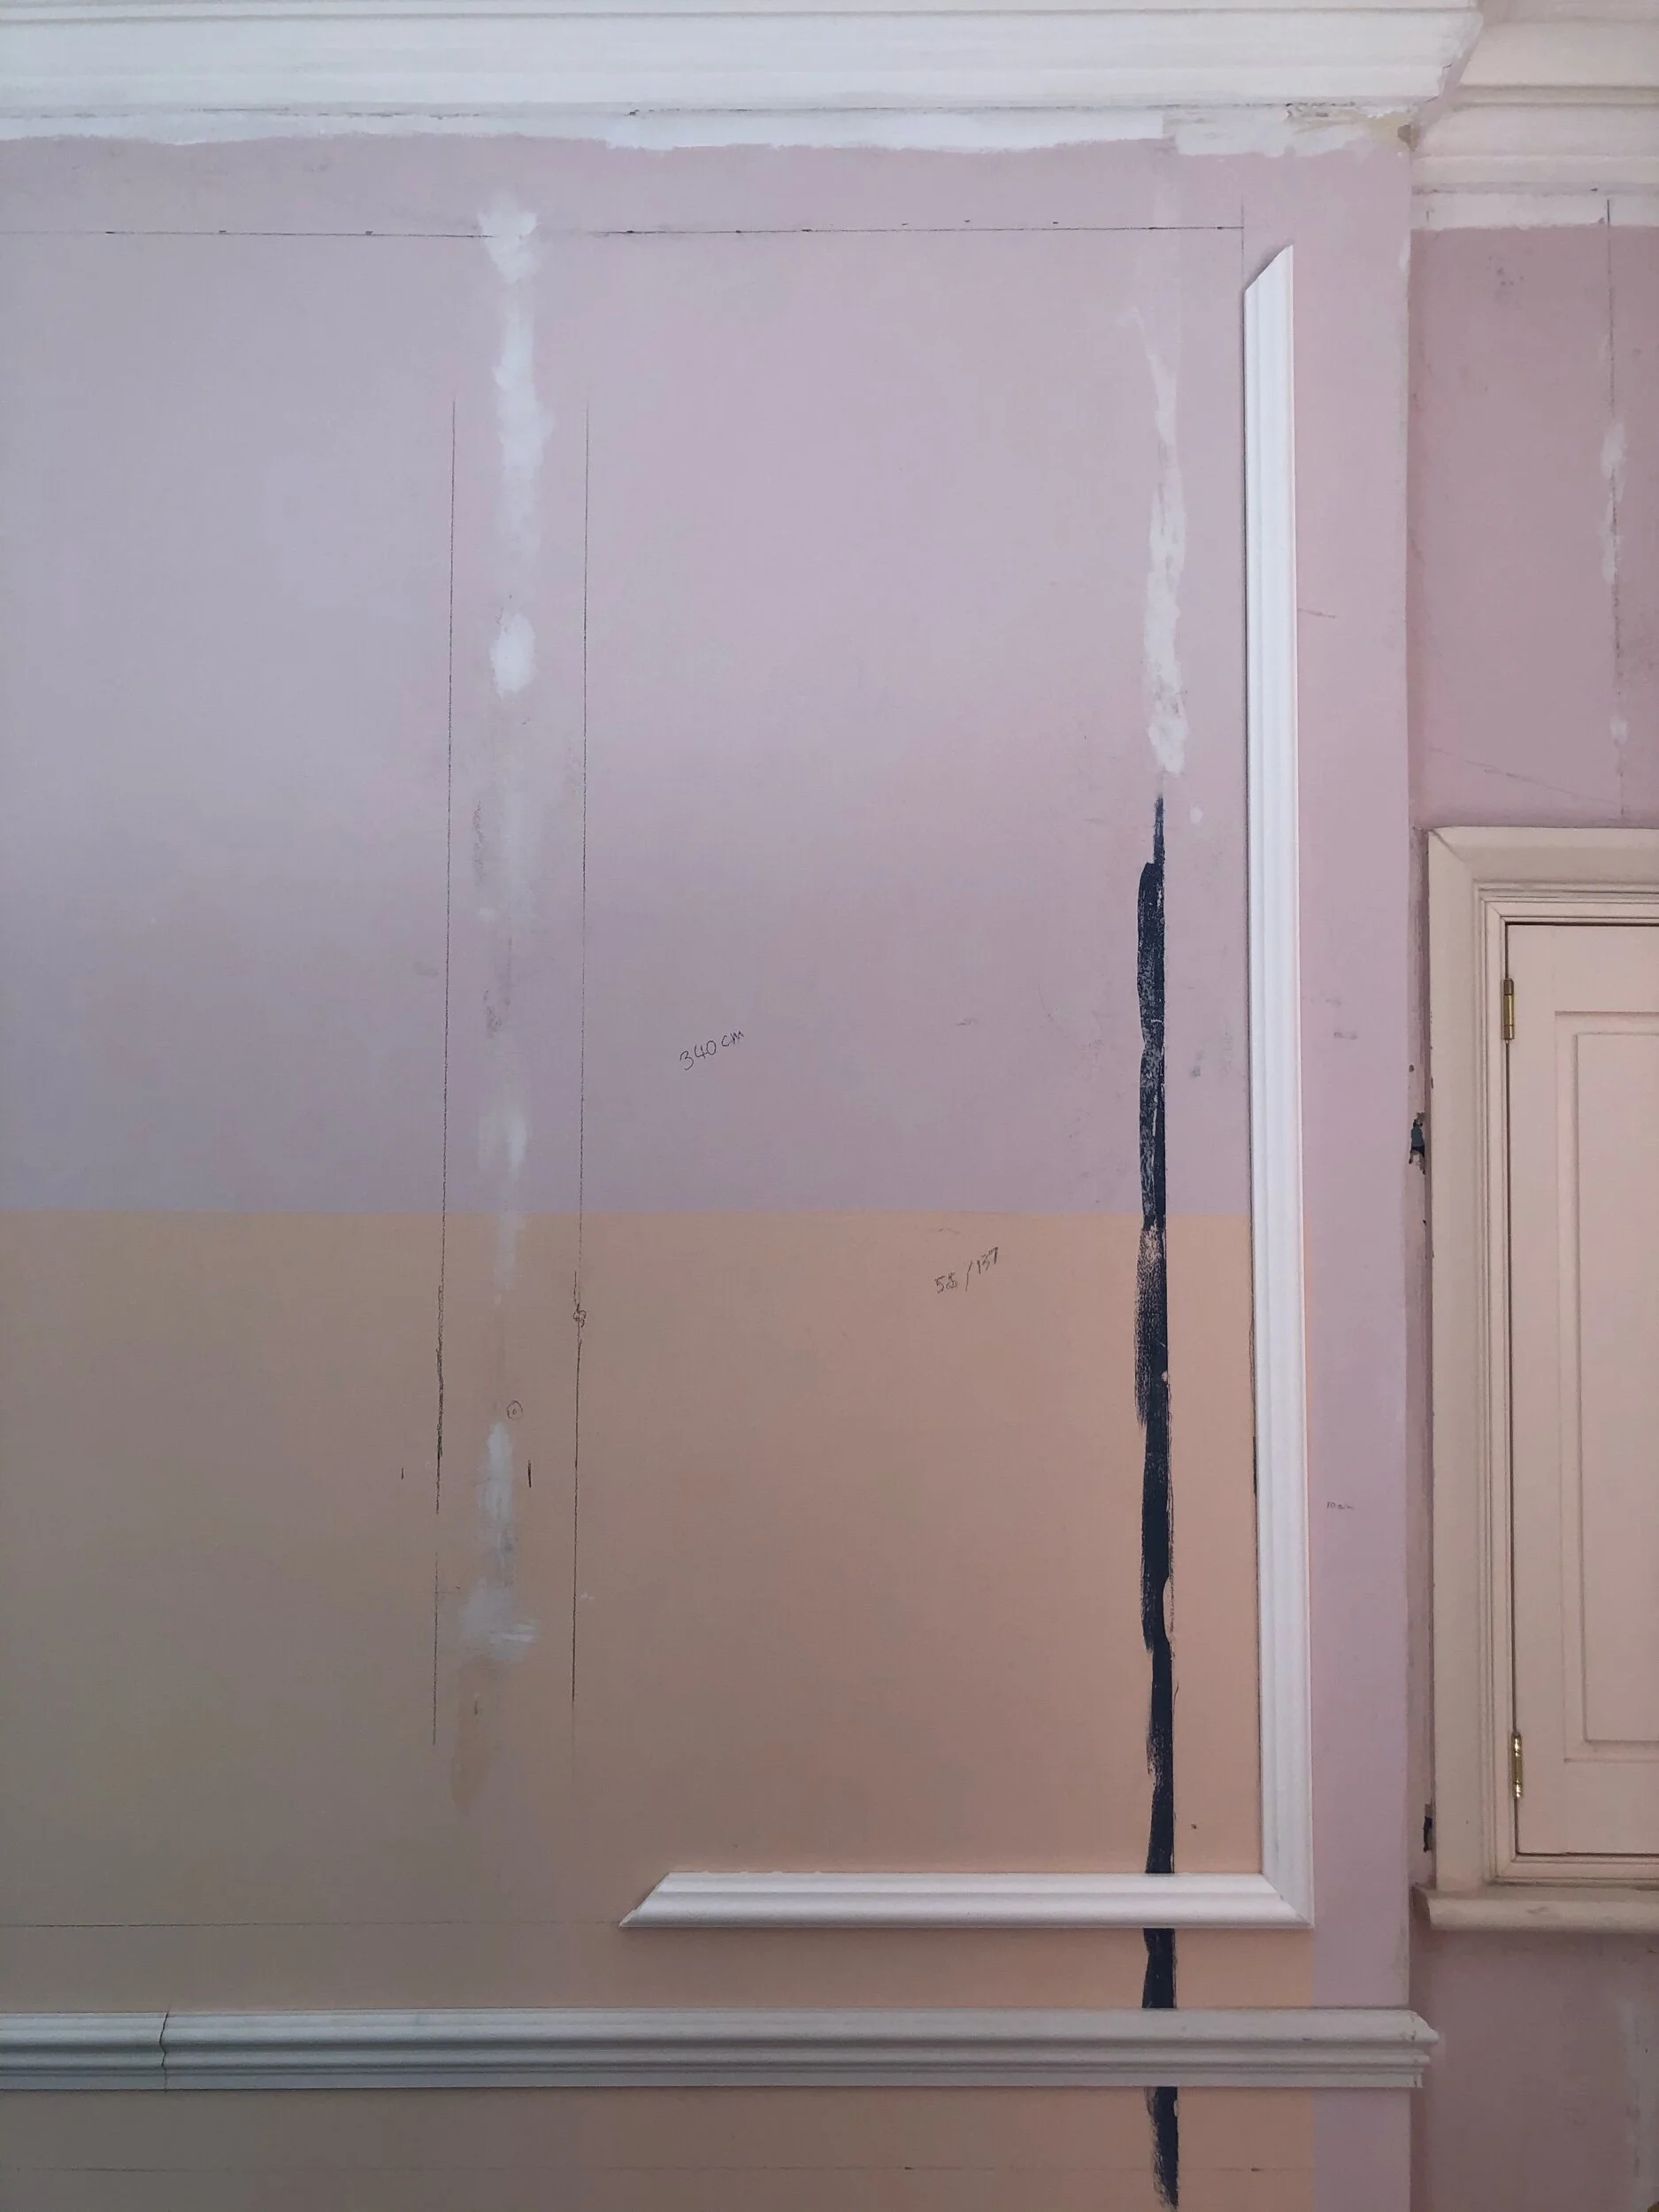
As I was panelling a bedroom and the bed would be the focal point, I marked on the wall with a pencil where the top of the headboard sits, as well as the placement of my bedside tables. I wanted to make sure that the central chair rail that I was going to put up flowed out and above these items and looked perfectly placed. If you are not panelling a bedroom and are unsure what height to place your central dado, simply take a chair and mark where the back would rest against a wall! A dado chair rail is traditionally designed as a protective barrier in a room where furniture is moved around often, so you can’t go wrong using the traditional placing height.
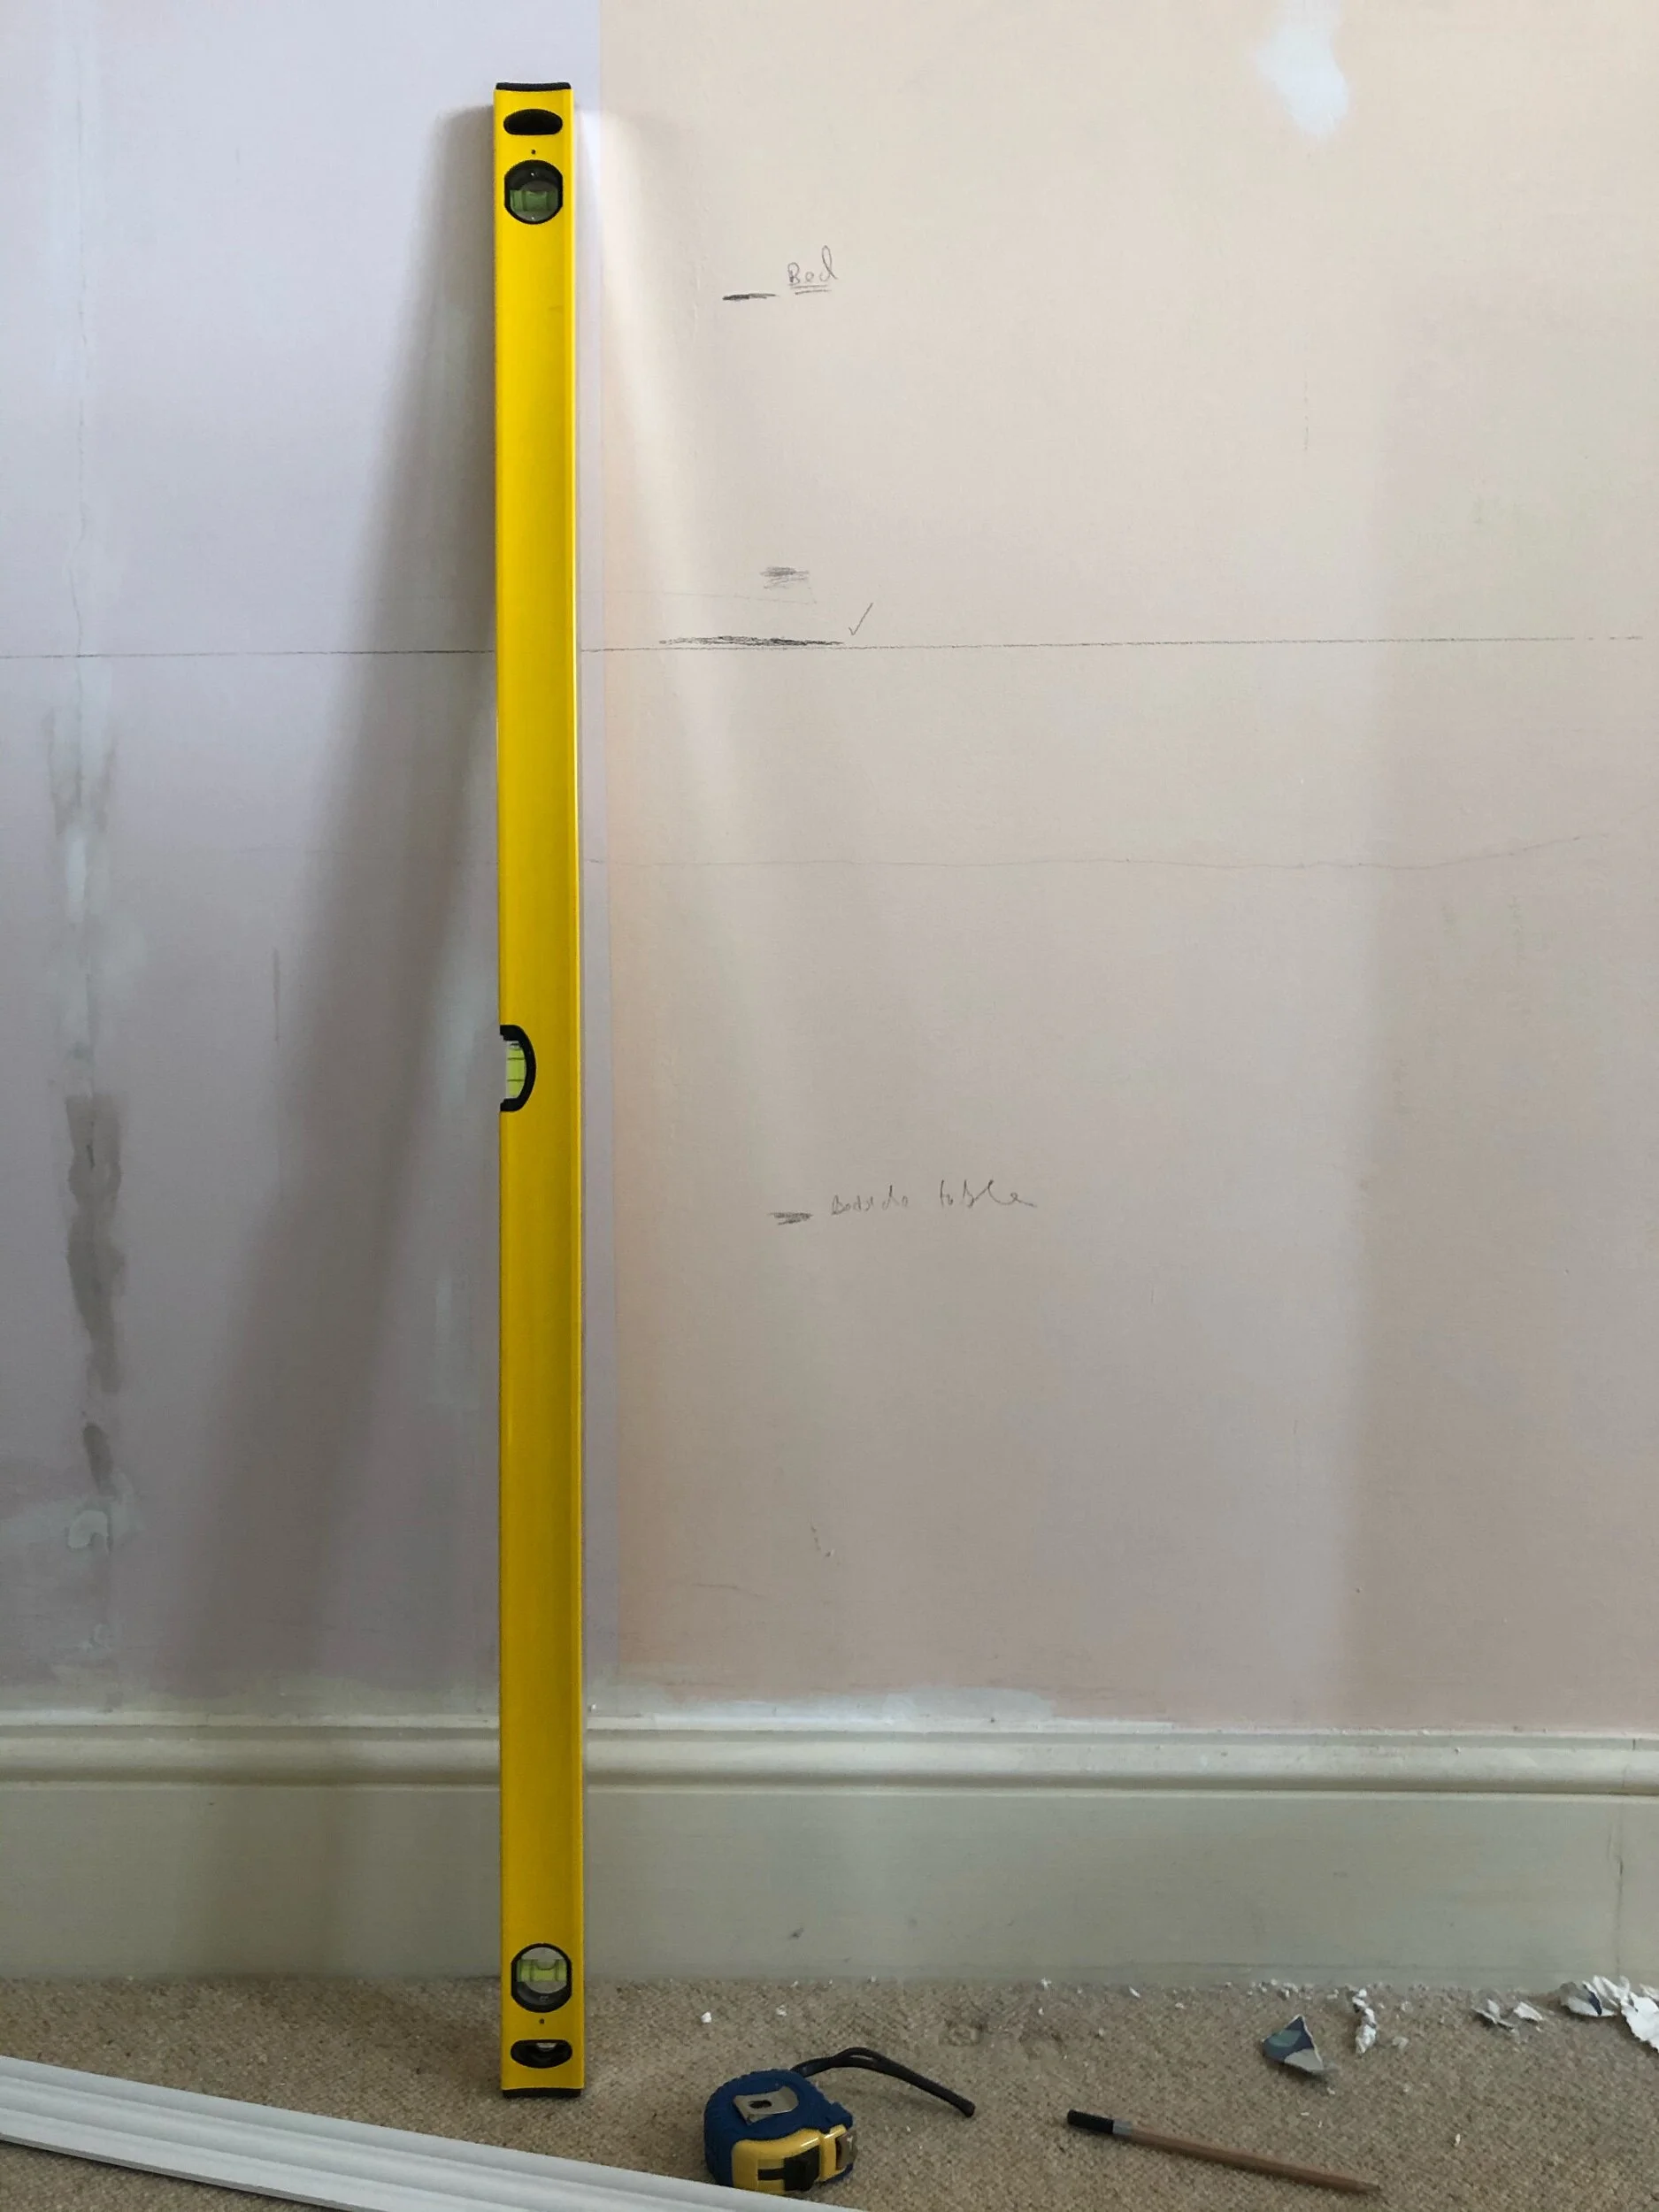
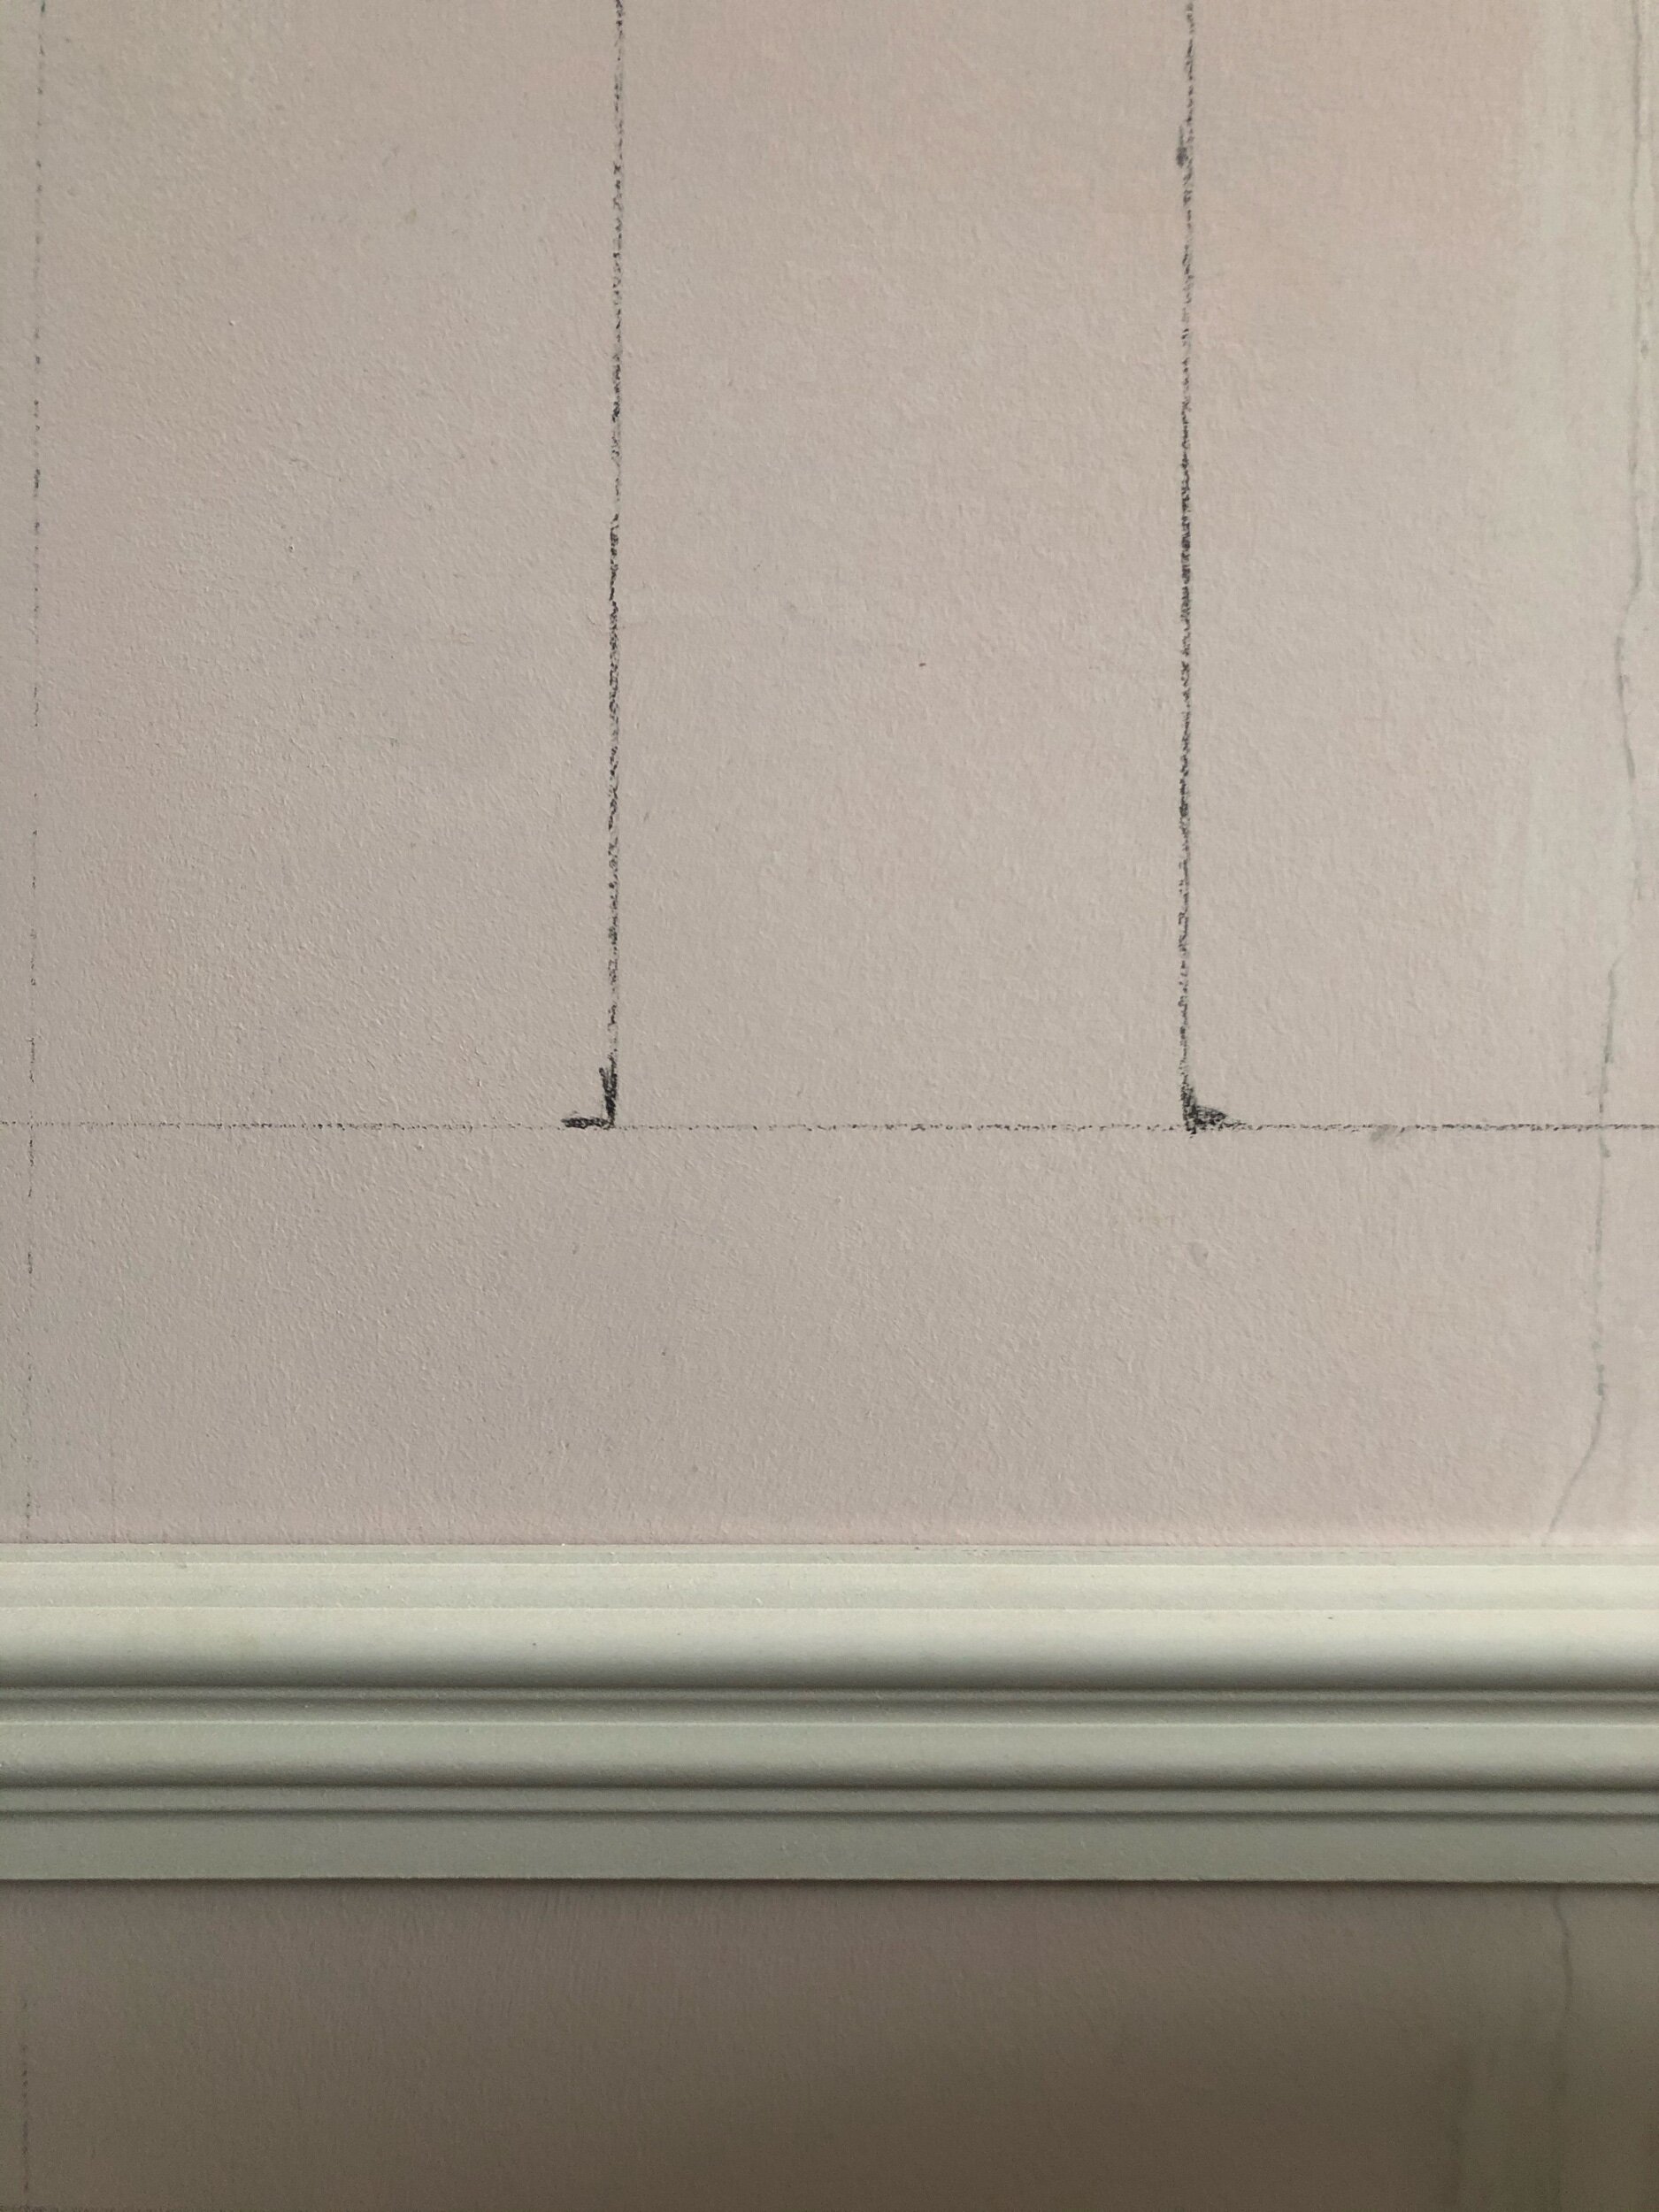
I marked the height level of existing furniture in the room and then pencilled on the perfect position for the central dado chair rail.
STEP 2: cut and apply your central dado rail
It is so important to apply your central dado rail perfectly straight, as it is this rail that you will be using as the starting point for all your decorative panels above and below it.
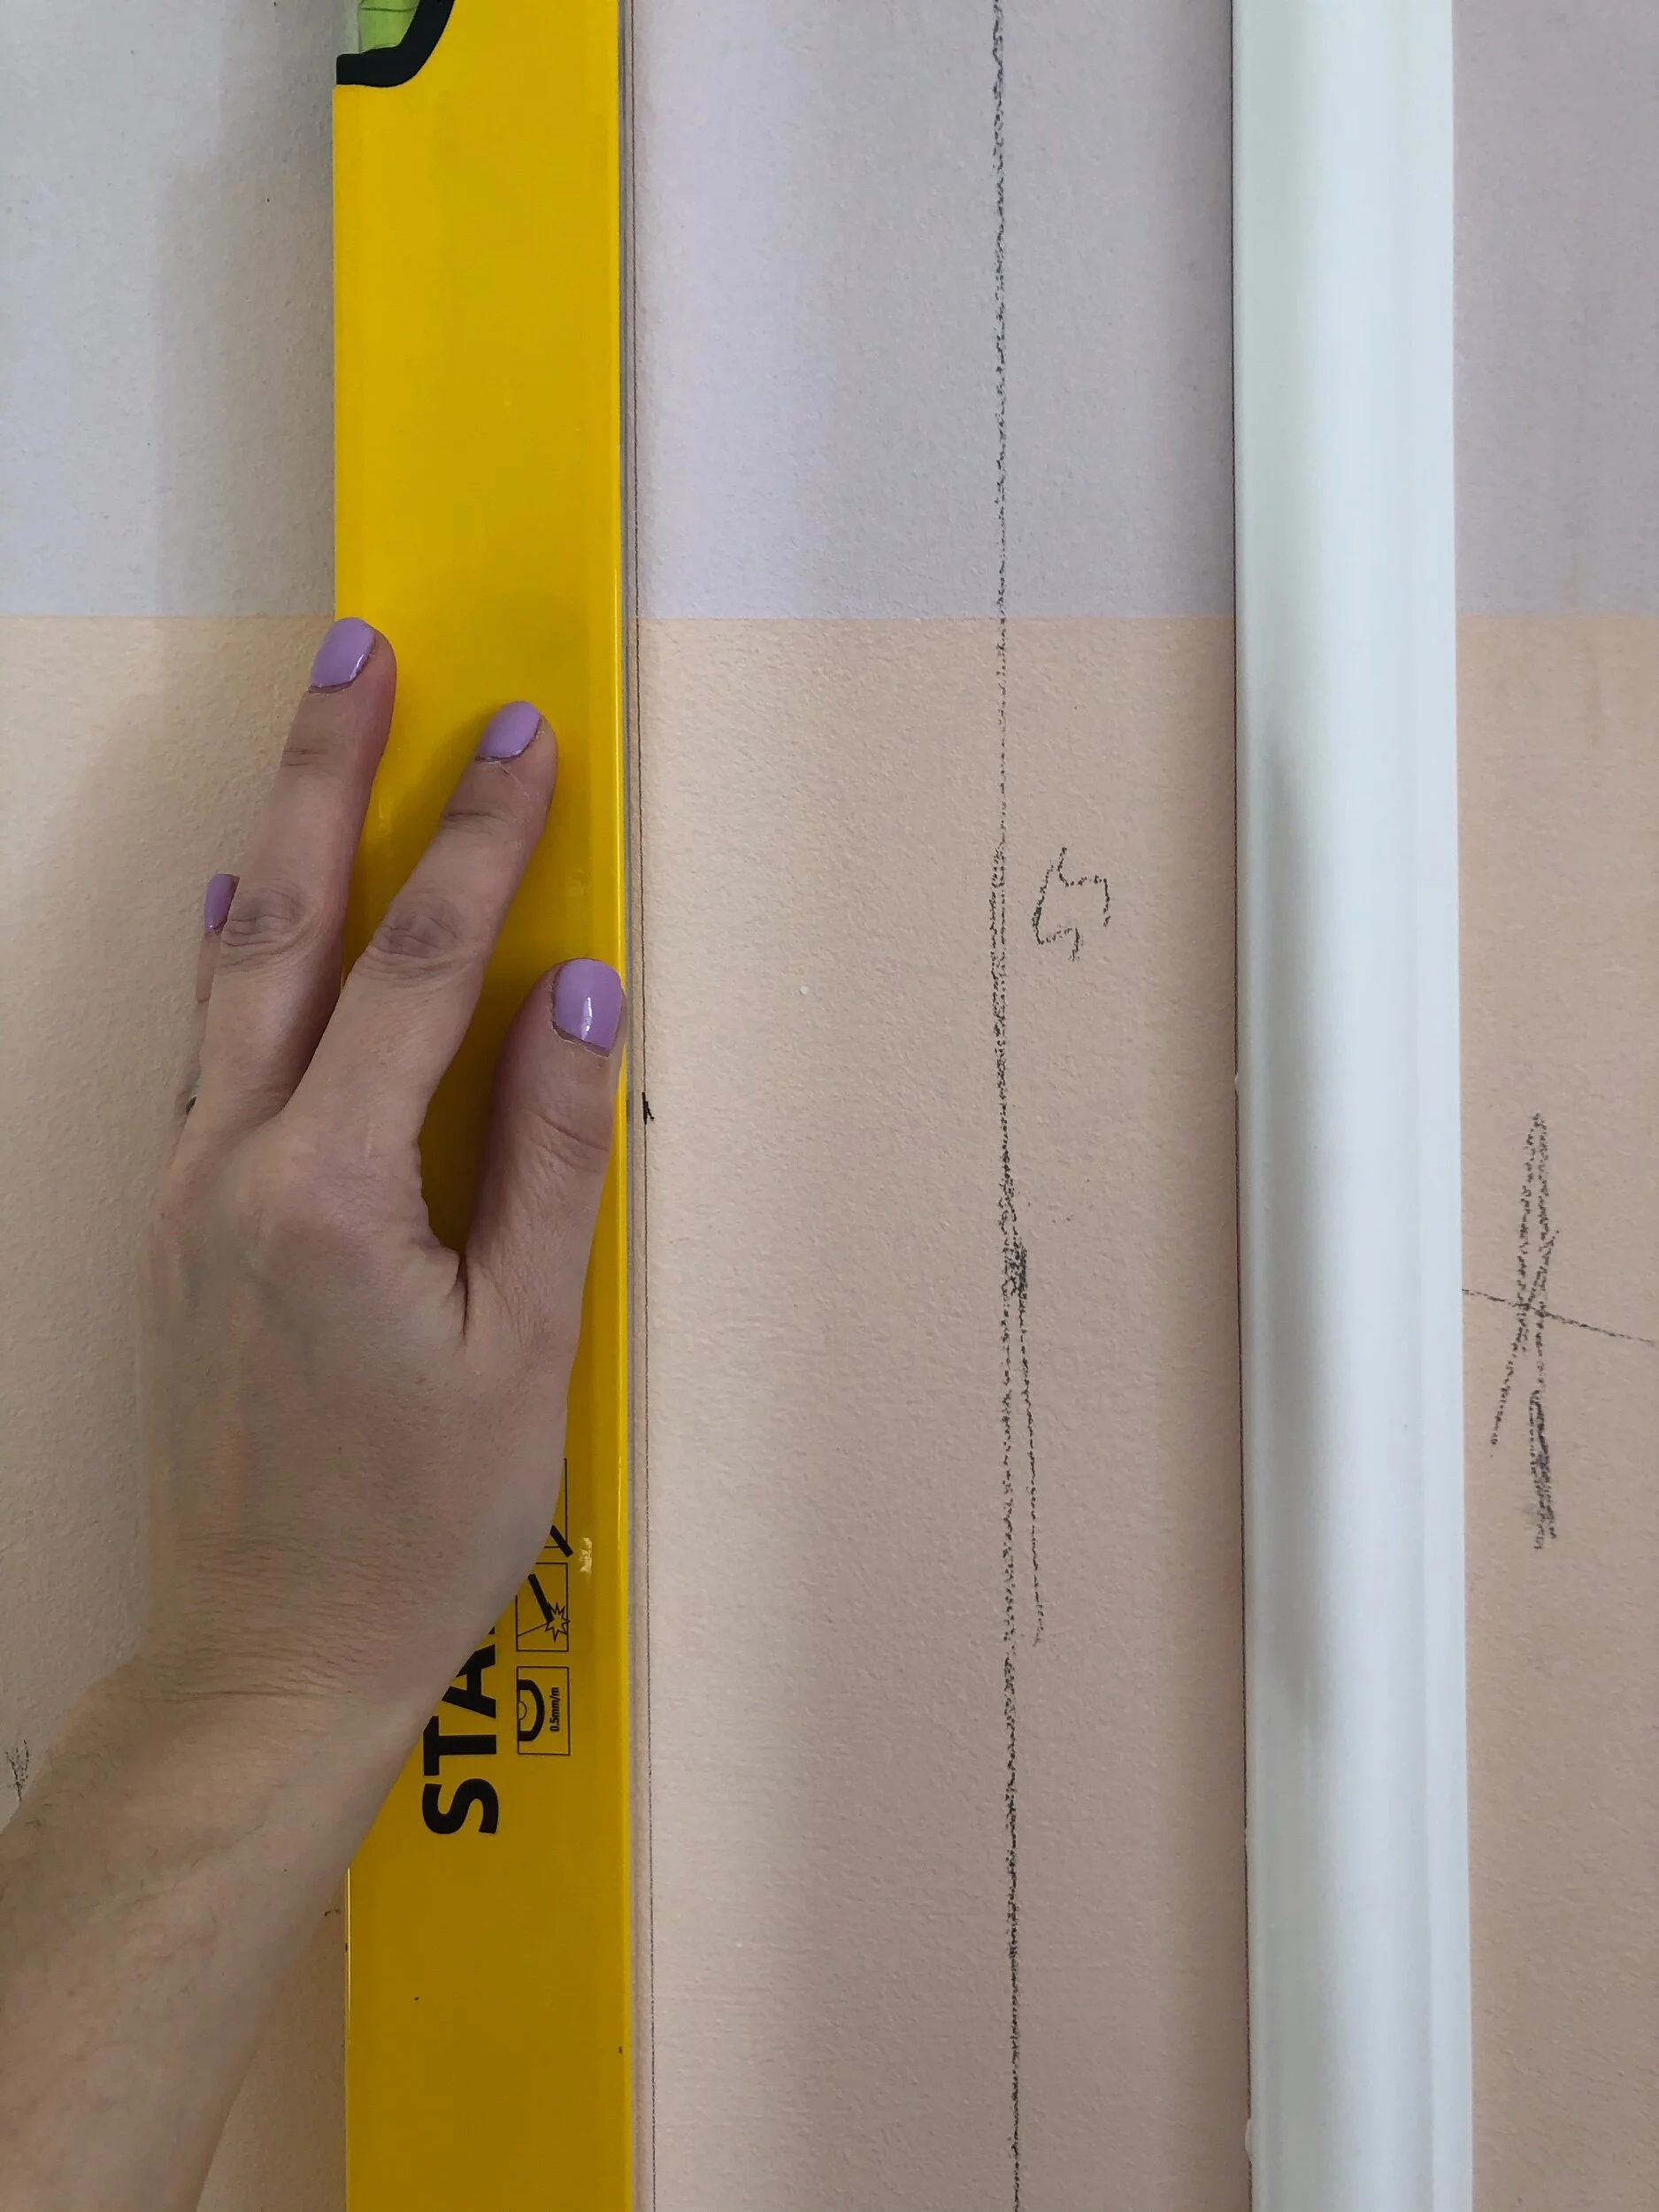
Do not rely on measuring down from your ceiling or up from your skirting to get a straight line - it is very likely that both of these will not be completely level! Instead, I used a builder’s spirit level to apply a central pencil line across the middle of the wall. If you have one to hand, a laser level is also an excellent tool for marking super-straight lines and some people prefer this to a builders level altogether.

This corner protrudes out into the room so requires an ‘external mitre cut’. The next corner requires an ‘internal mitre cut’.
Measure the width of your longest area of wall first and mark that width on your first piece of dado rail, leaving 5cm excess at each end for angled mitre cuts if your dado is going around the room. These cuts will need to be cut at 45°angles to meet and join the next piece. Before you cut anything:
Make sure you know if you are cutting ‘outward’ or ‘inward’ for each corner (to get an external mitre cut or an internal mitre cut.) You will need different cuts depending on if your corner protrudes out or recedes in (see the image above).
Make sure that you have your dado rail the right way up or down in your mitre box or saw if it is not a symmetrical design. If you cut ‘upside down’, you will ruin your whole piece of dado!
Check your corner is a perfect 45° - if it isn’t, use a set square and a protractor to get the exact measurements to cut (this is easier using an electric mitre saw than a box, but do not stress about it too much as any small gaps can be filled with filler.)
If your wall is wider in length than the piece of dado you have, mitre them together at an angle rather than butt the two ends as the end result is way better.
Once your dado is cut to size, liberally apply your instant grab adhesive to the back of your rail in a zig-zag. Place your rail along your pencil line on the wall and hold it firmly for a couple of minutes while it sets. You should find your rail doesn’t move, but if it is MDF or wood, you may need to use a couple of small panel nails to hold it in place (this is why I now prefer polymer mouldings over wood - they are so lightweight they only require glue and you avoid unsightly filled nail holes.)
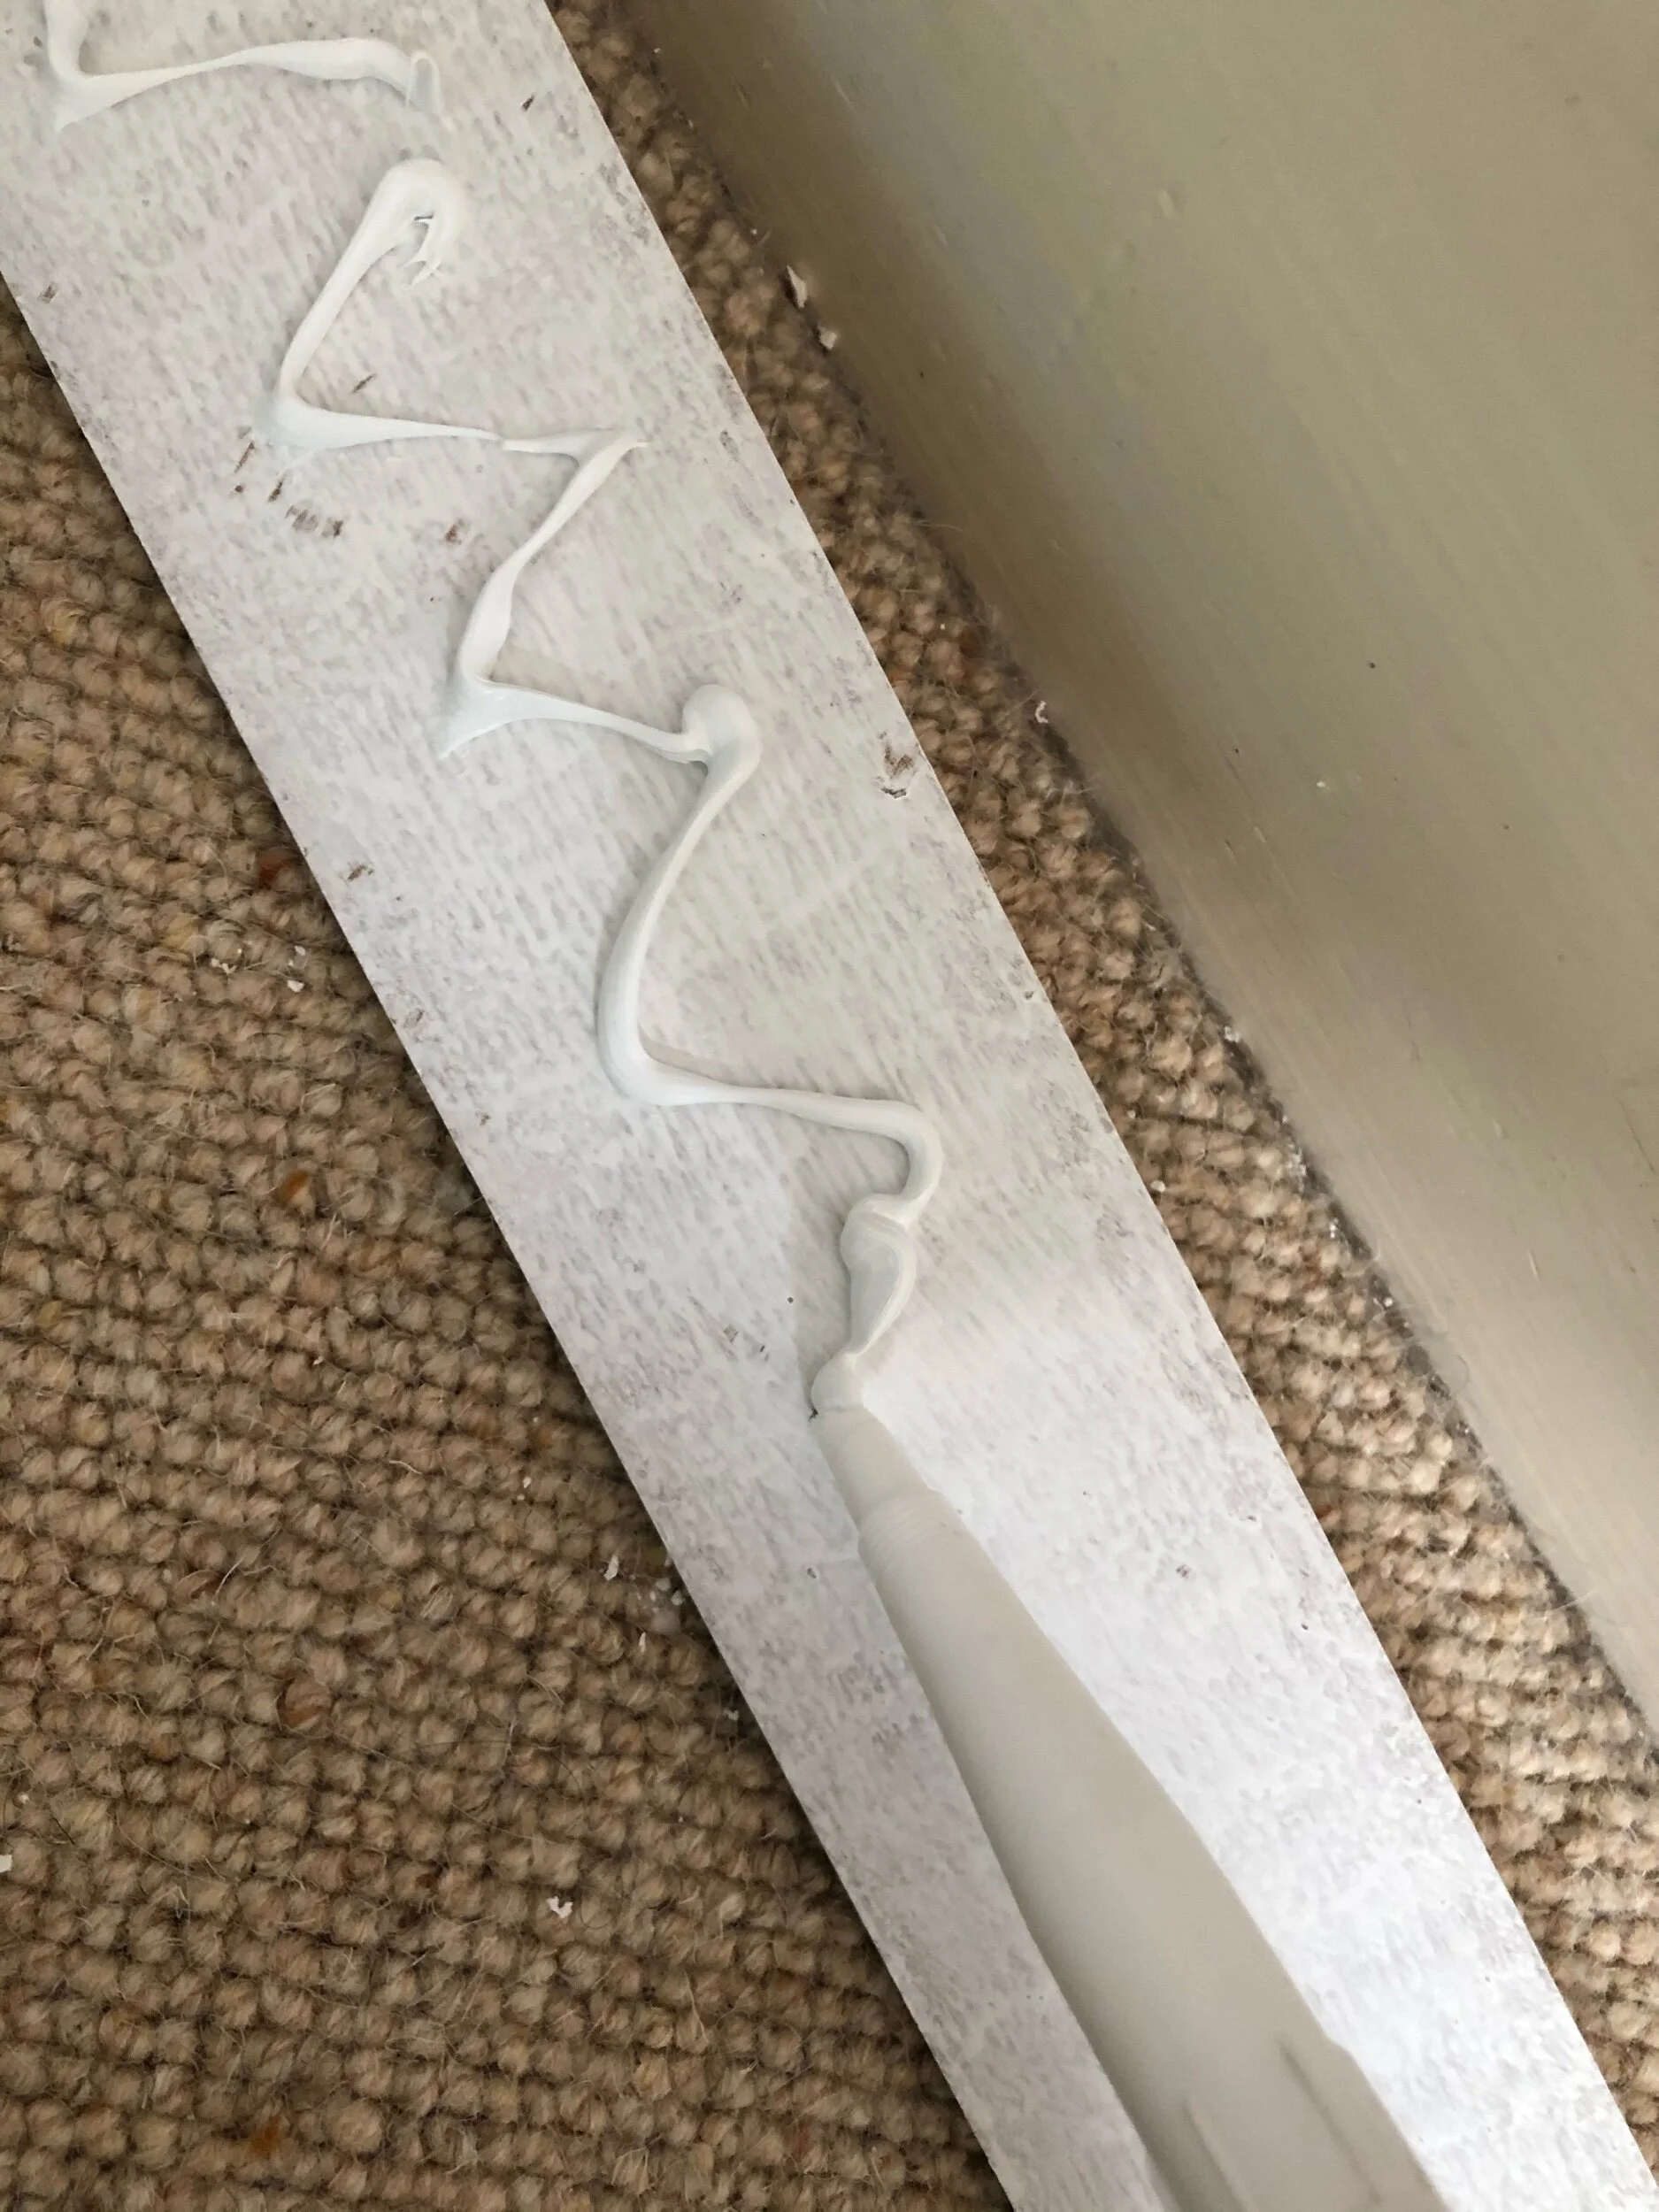
Apply your instant grab interior adhesive in a zig-zag across the back of the rail.
Hold your rail in place for a few minutes so the instant grab sets.
Step 3: Measure Your Walls For The decorative Panels
The scale and size of your decorative panels will depend on how wide your walls are and how you want them to look.
Once your central dado has been applied, it is time to start working out the size and position of your decorative panels. I found that the easiest way to start this process was to unpack the polymer strips I had and balance them against the widest area of wall to give me a rough idea of how I wanted them to look and the distance between each panel piece:
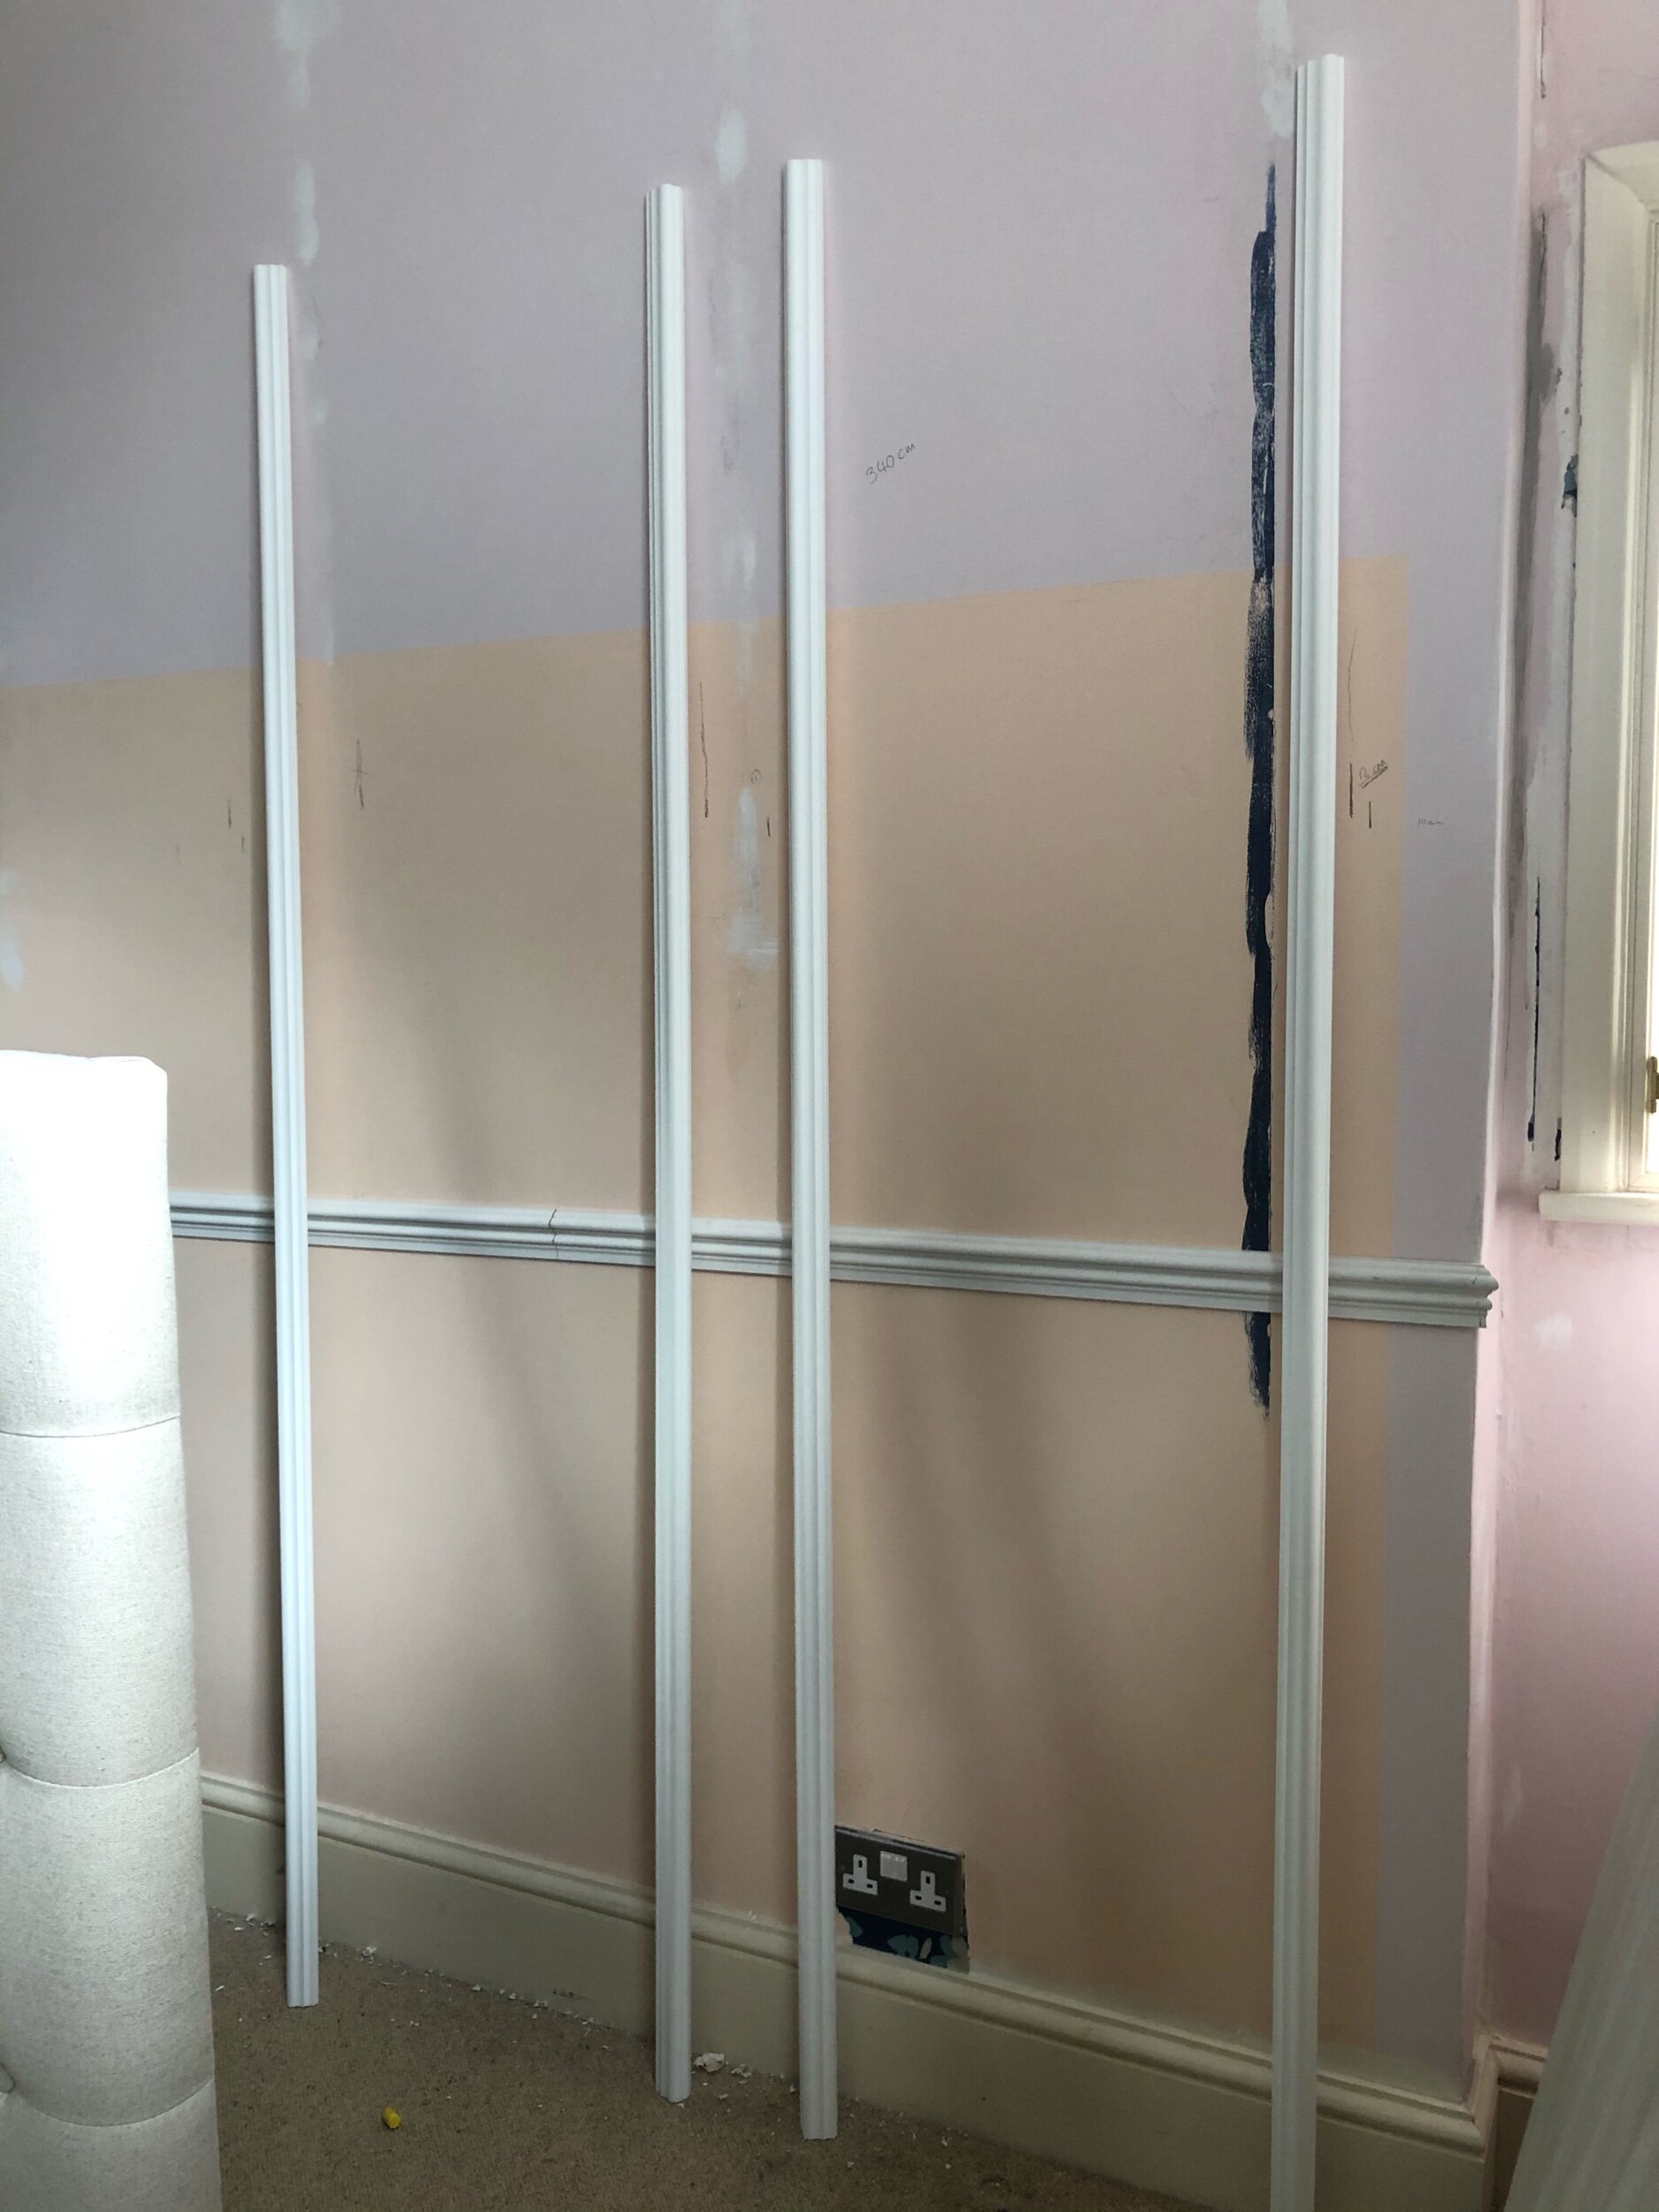
I stood my polymer mouldings so they were freestanding against my widest area of wall to get a vision in my head of how the panels should be placed.
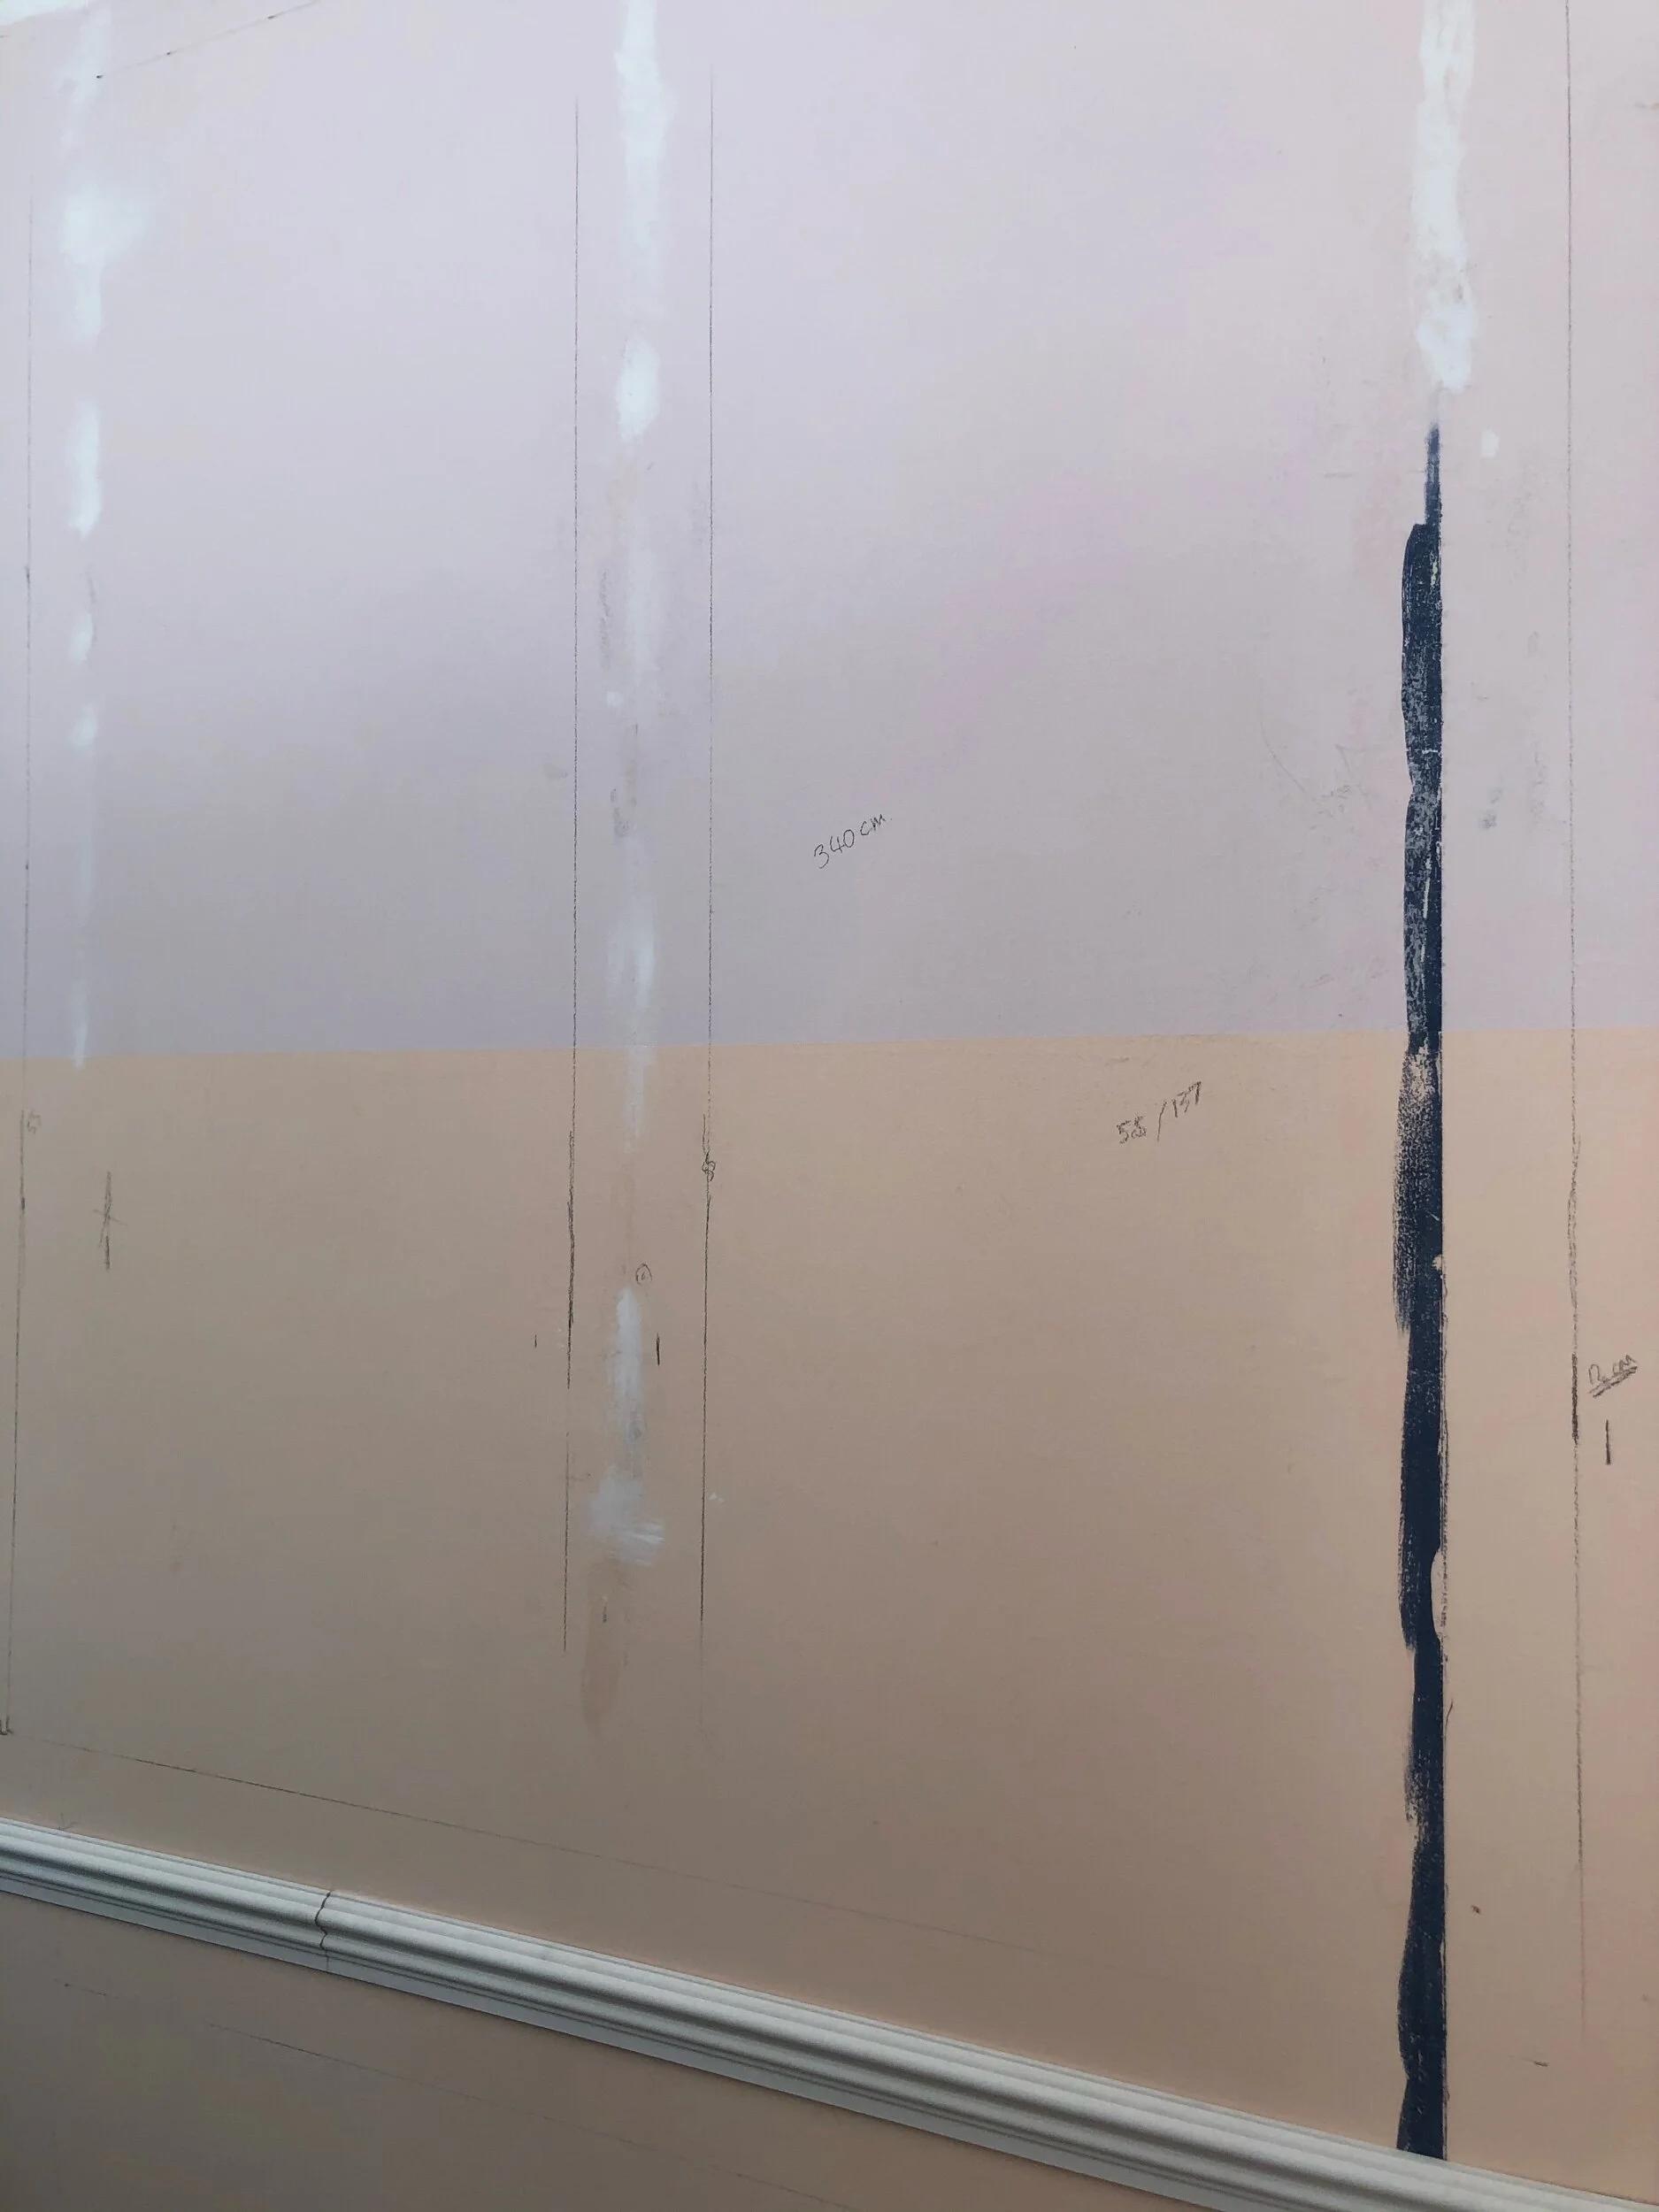
Using this freestanding method, I could see that this wall would require 5 panels. I then tested out a few measurements by drawing where the panels would go onto the wall in pencil using the aluminium ruler.
Using the spirit level and an aluminium ruler, I drew the exact placement of where I wanted my decorative panels to go.
Once I had decided on a width for each panel, I measured 10cm down from the coving on the ceiling and 10cm up from the dado rail so that I could confirm the scale of the panels. Once I was happy with the layout, I used the spirit level to make the final markings on the walls. My top panels ended up being 137cm x 55cm each, with my lower panels 45cm x 55cm.
The best advice I can give before you cut or apply anything to the wall is to measure a multitude of times and refer to your spirit level when both marking the wall and applying the sections of panel.
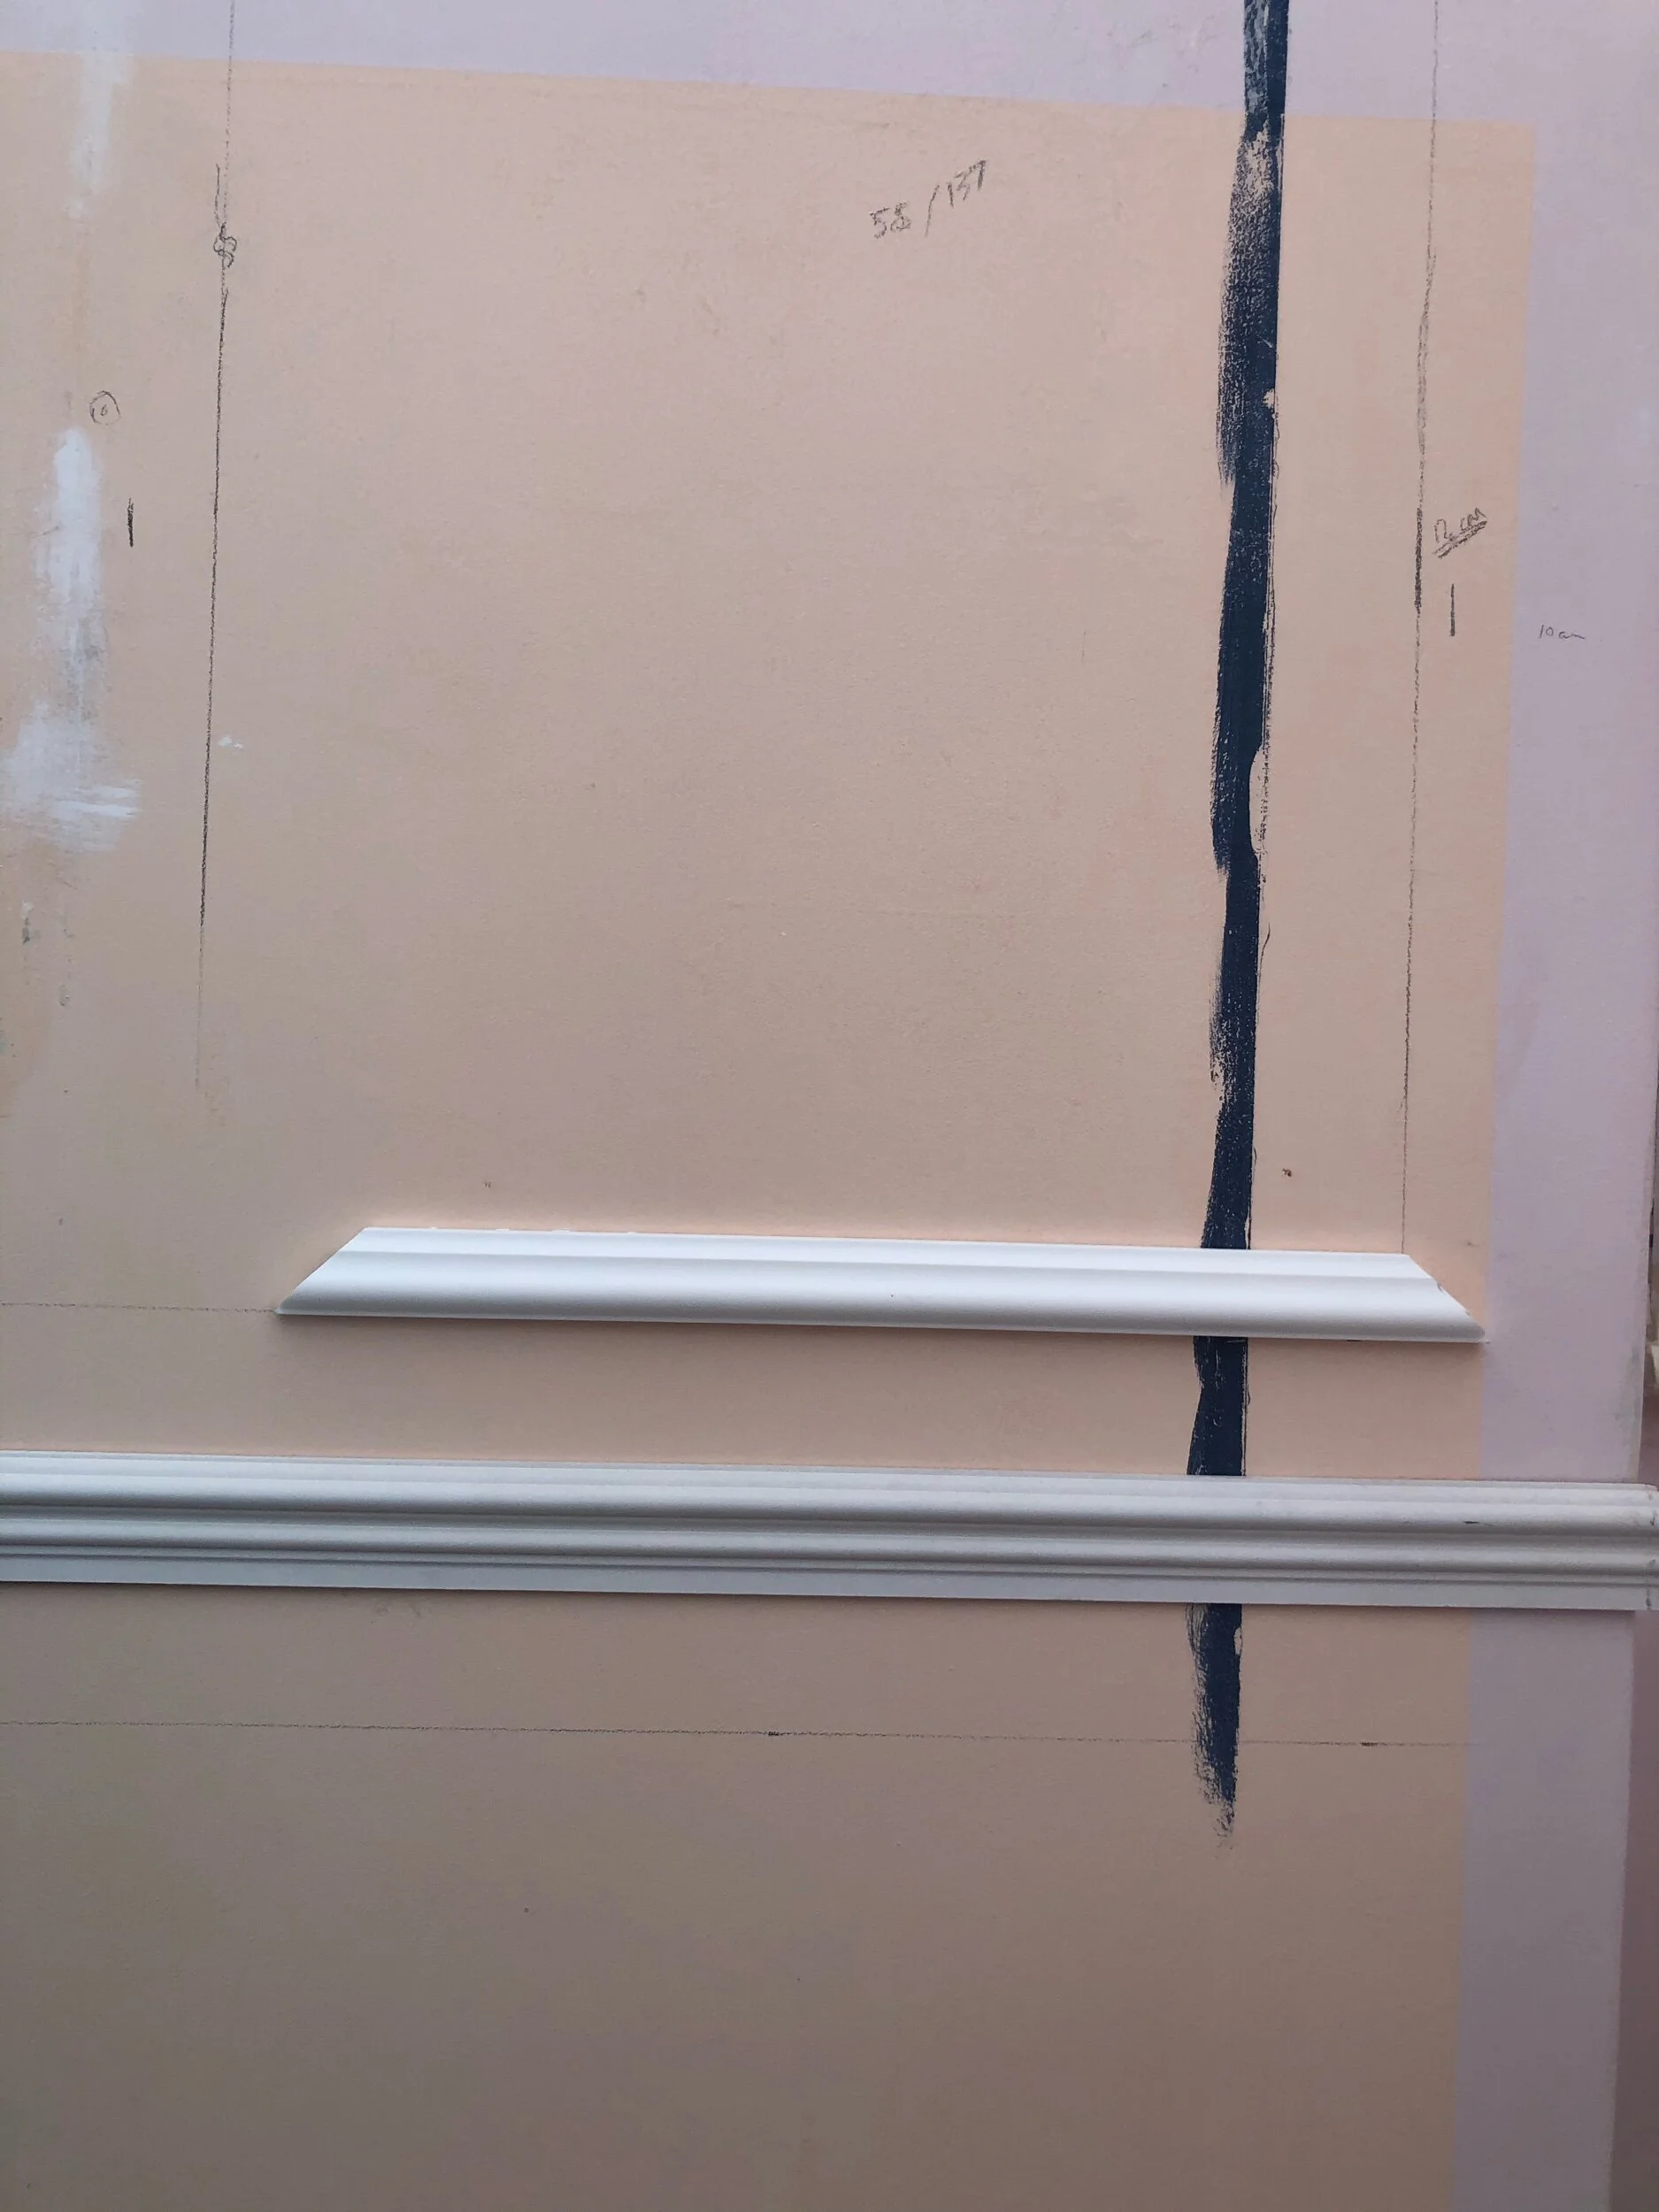
Step 4: Cut your polymer Strips to size.
To begin, I just cut one panel to size first to make sure everything was correct. I cut the top and the bottom piece at 55cm and the two sides at 137cm at a 45° angle.
Remember to place the piece of the panel you are cutting up the right way if it is not a symmetrical design before you cut it.
Always keep in mind the direction of the cut - will it meet the next piece correctly?
Your cut should be precise with polymer, but if you have any jagged edges, give them a light sand down with the sandpaper.
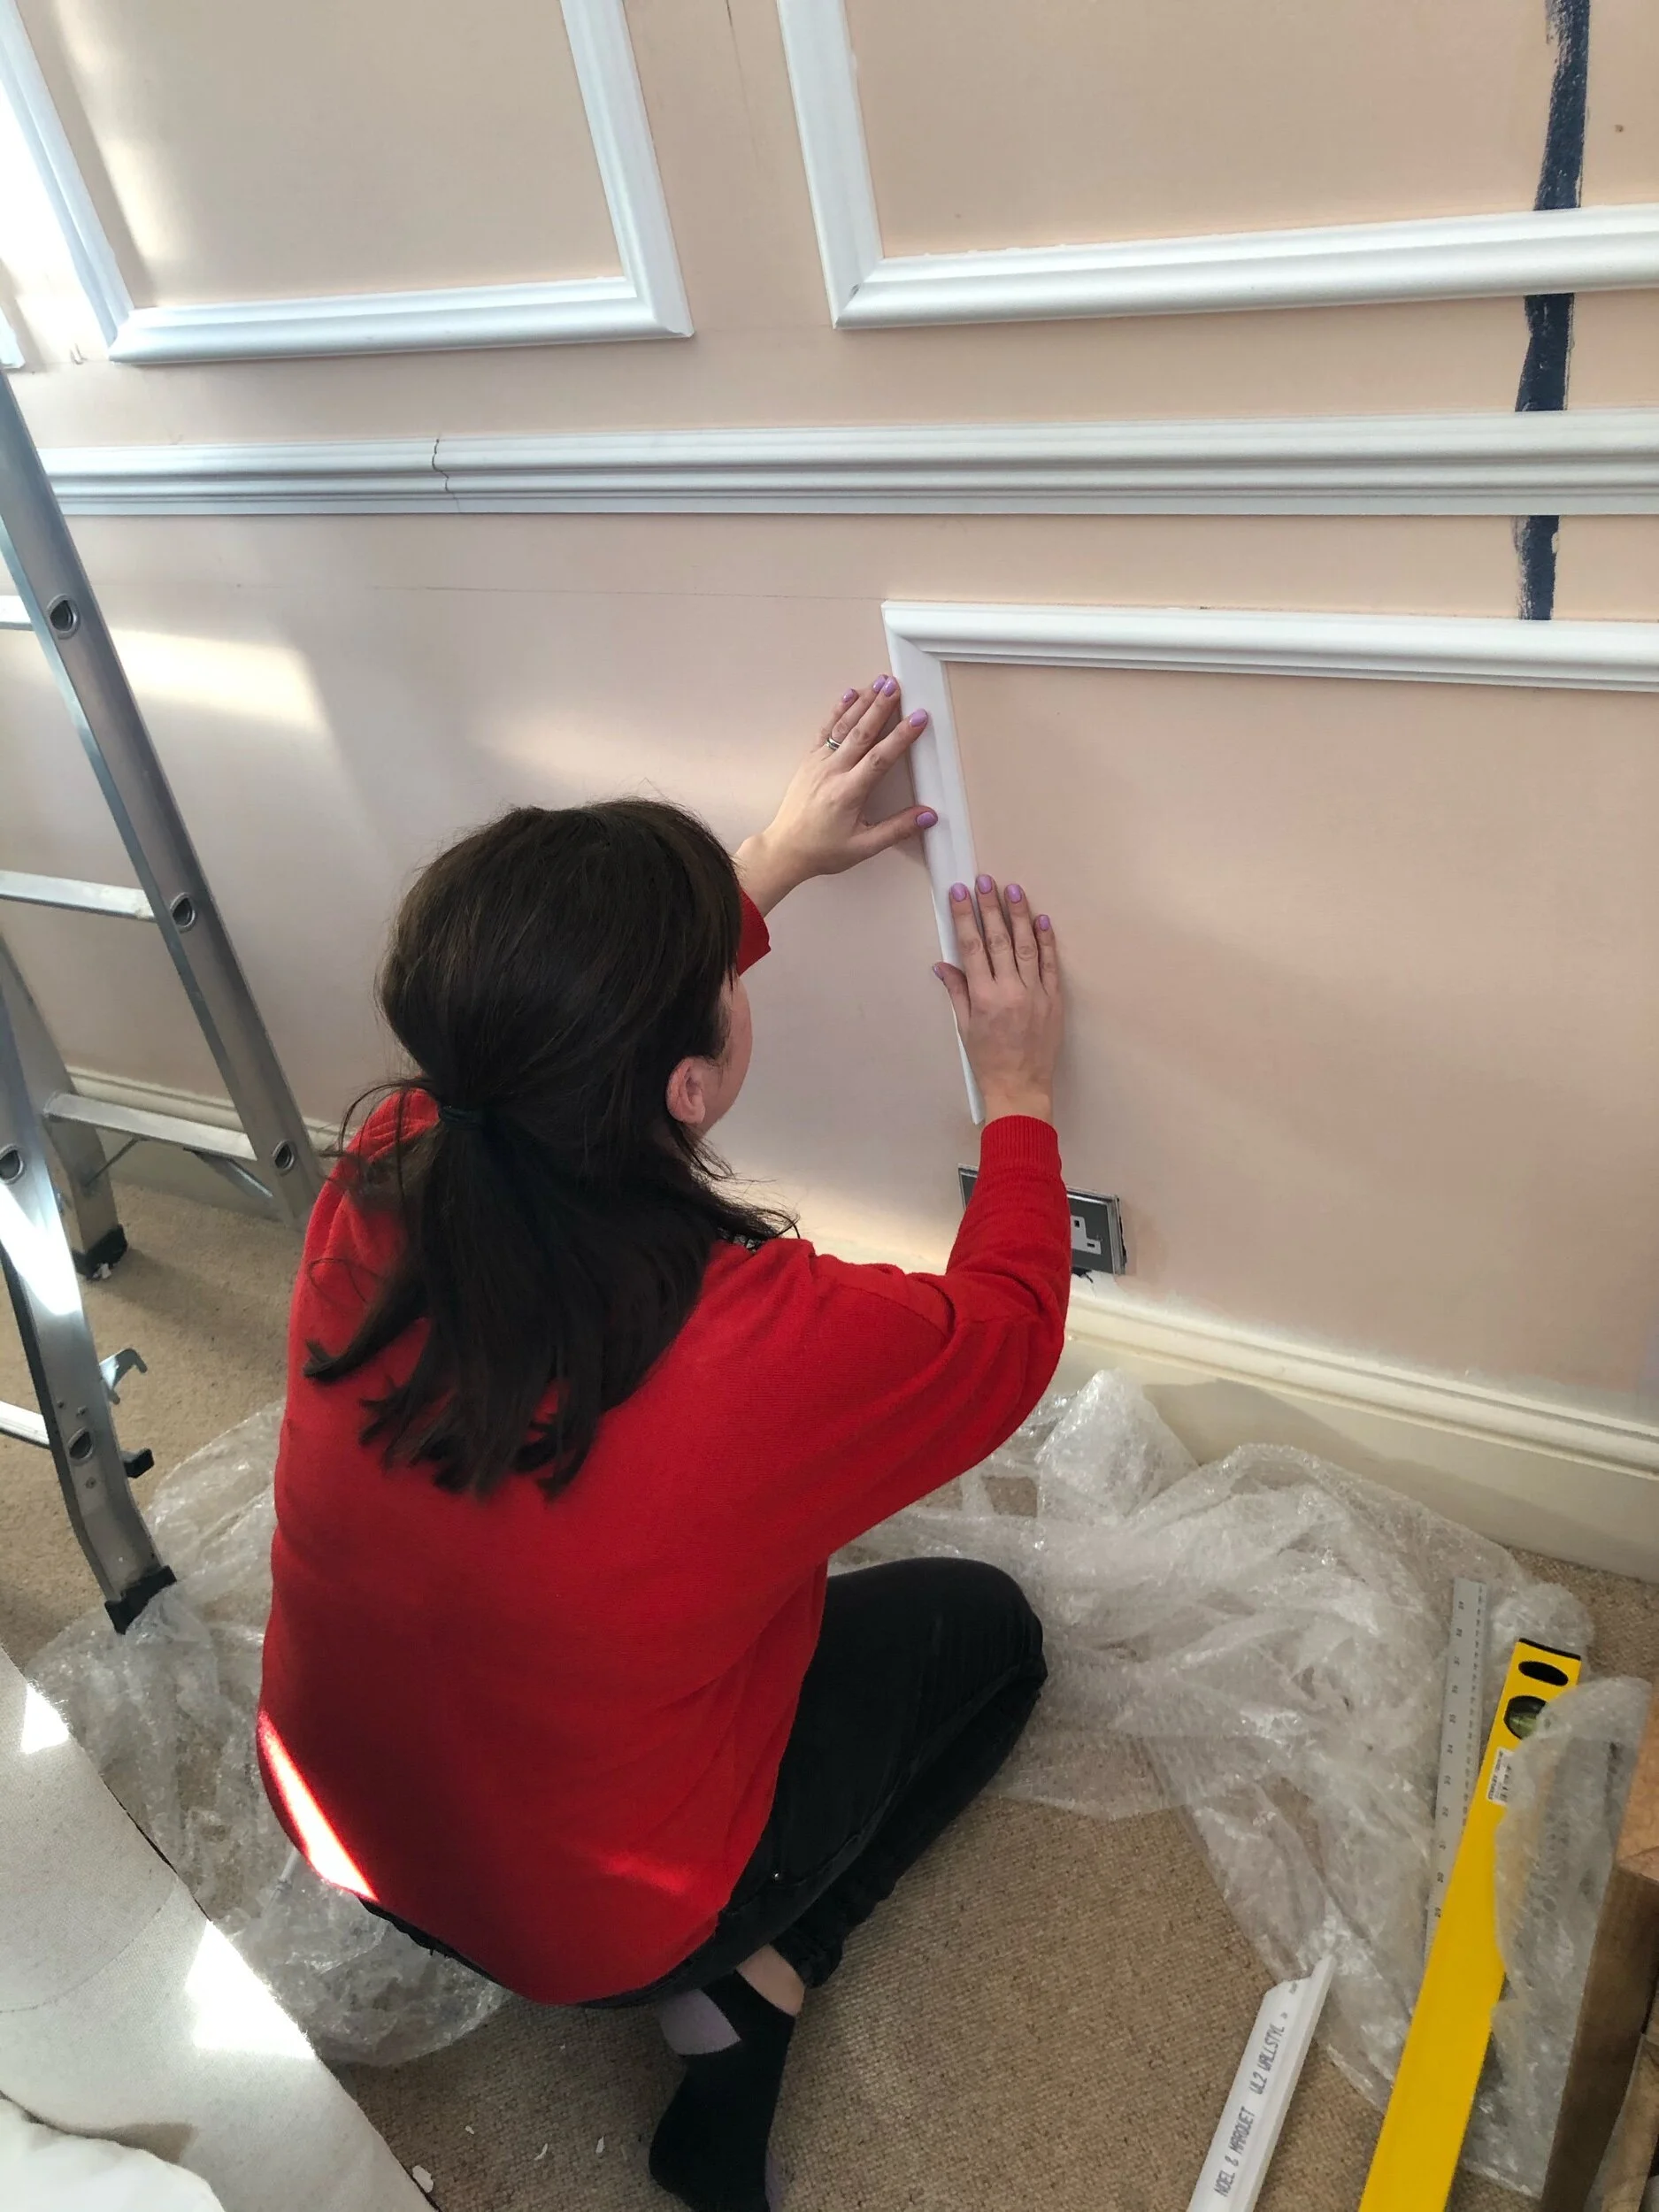
Glue your panel strips onto the wall with the instant grab adhesive. Make sure your corners align and check the placement of each piece with the spirit level as you go. The great thing about polymer panels being so light is that glue is sufficient for adhesion, so you can wiggle and manouve your panel pieces around after application (unlike if you had nailed them to the wall.)
Always double check your measurements and use your spirit level continuously to check the placement of each panel piece. Each piece is a domino for the placement of the next panel, so it is important to get it right!
Once you have completed the top panels, start on the bottom set - they need to completely align with the top panels, so use your aluminum ruler to check the positioning.

Use your aluminium ruler to align your bottom panels with your top pieces.
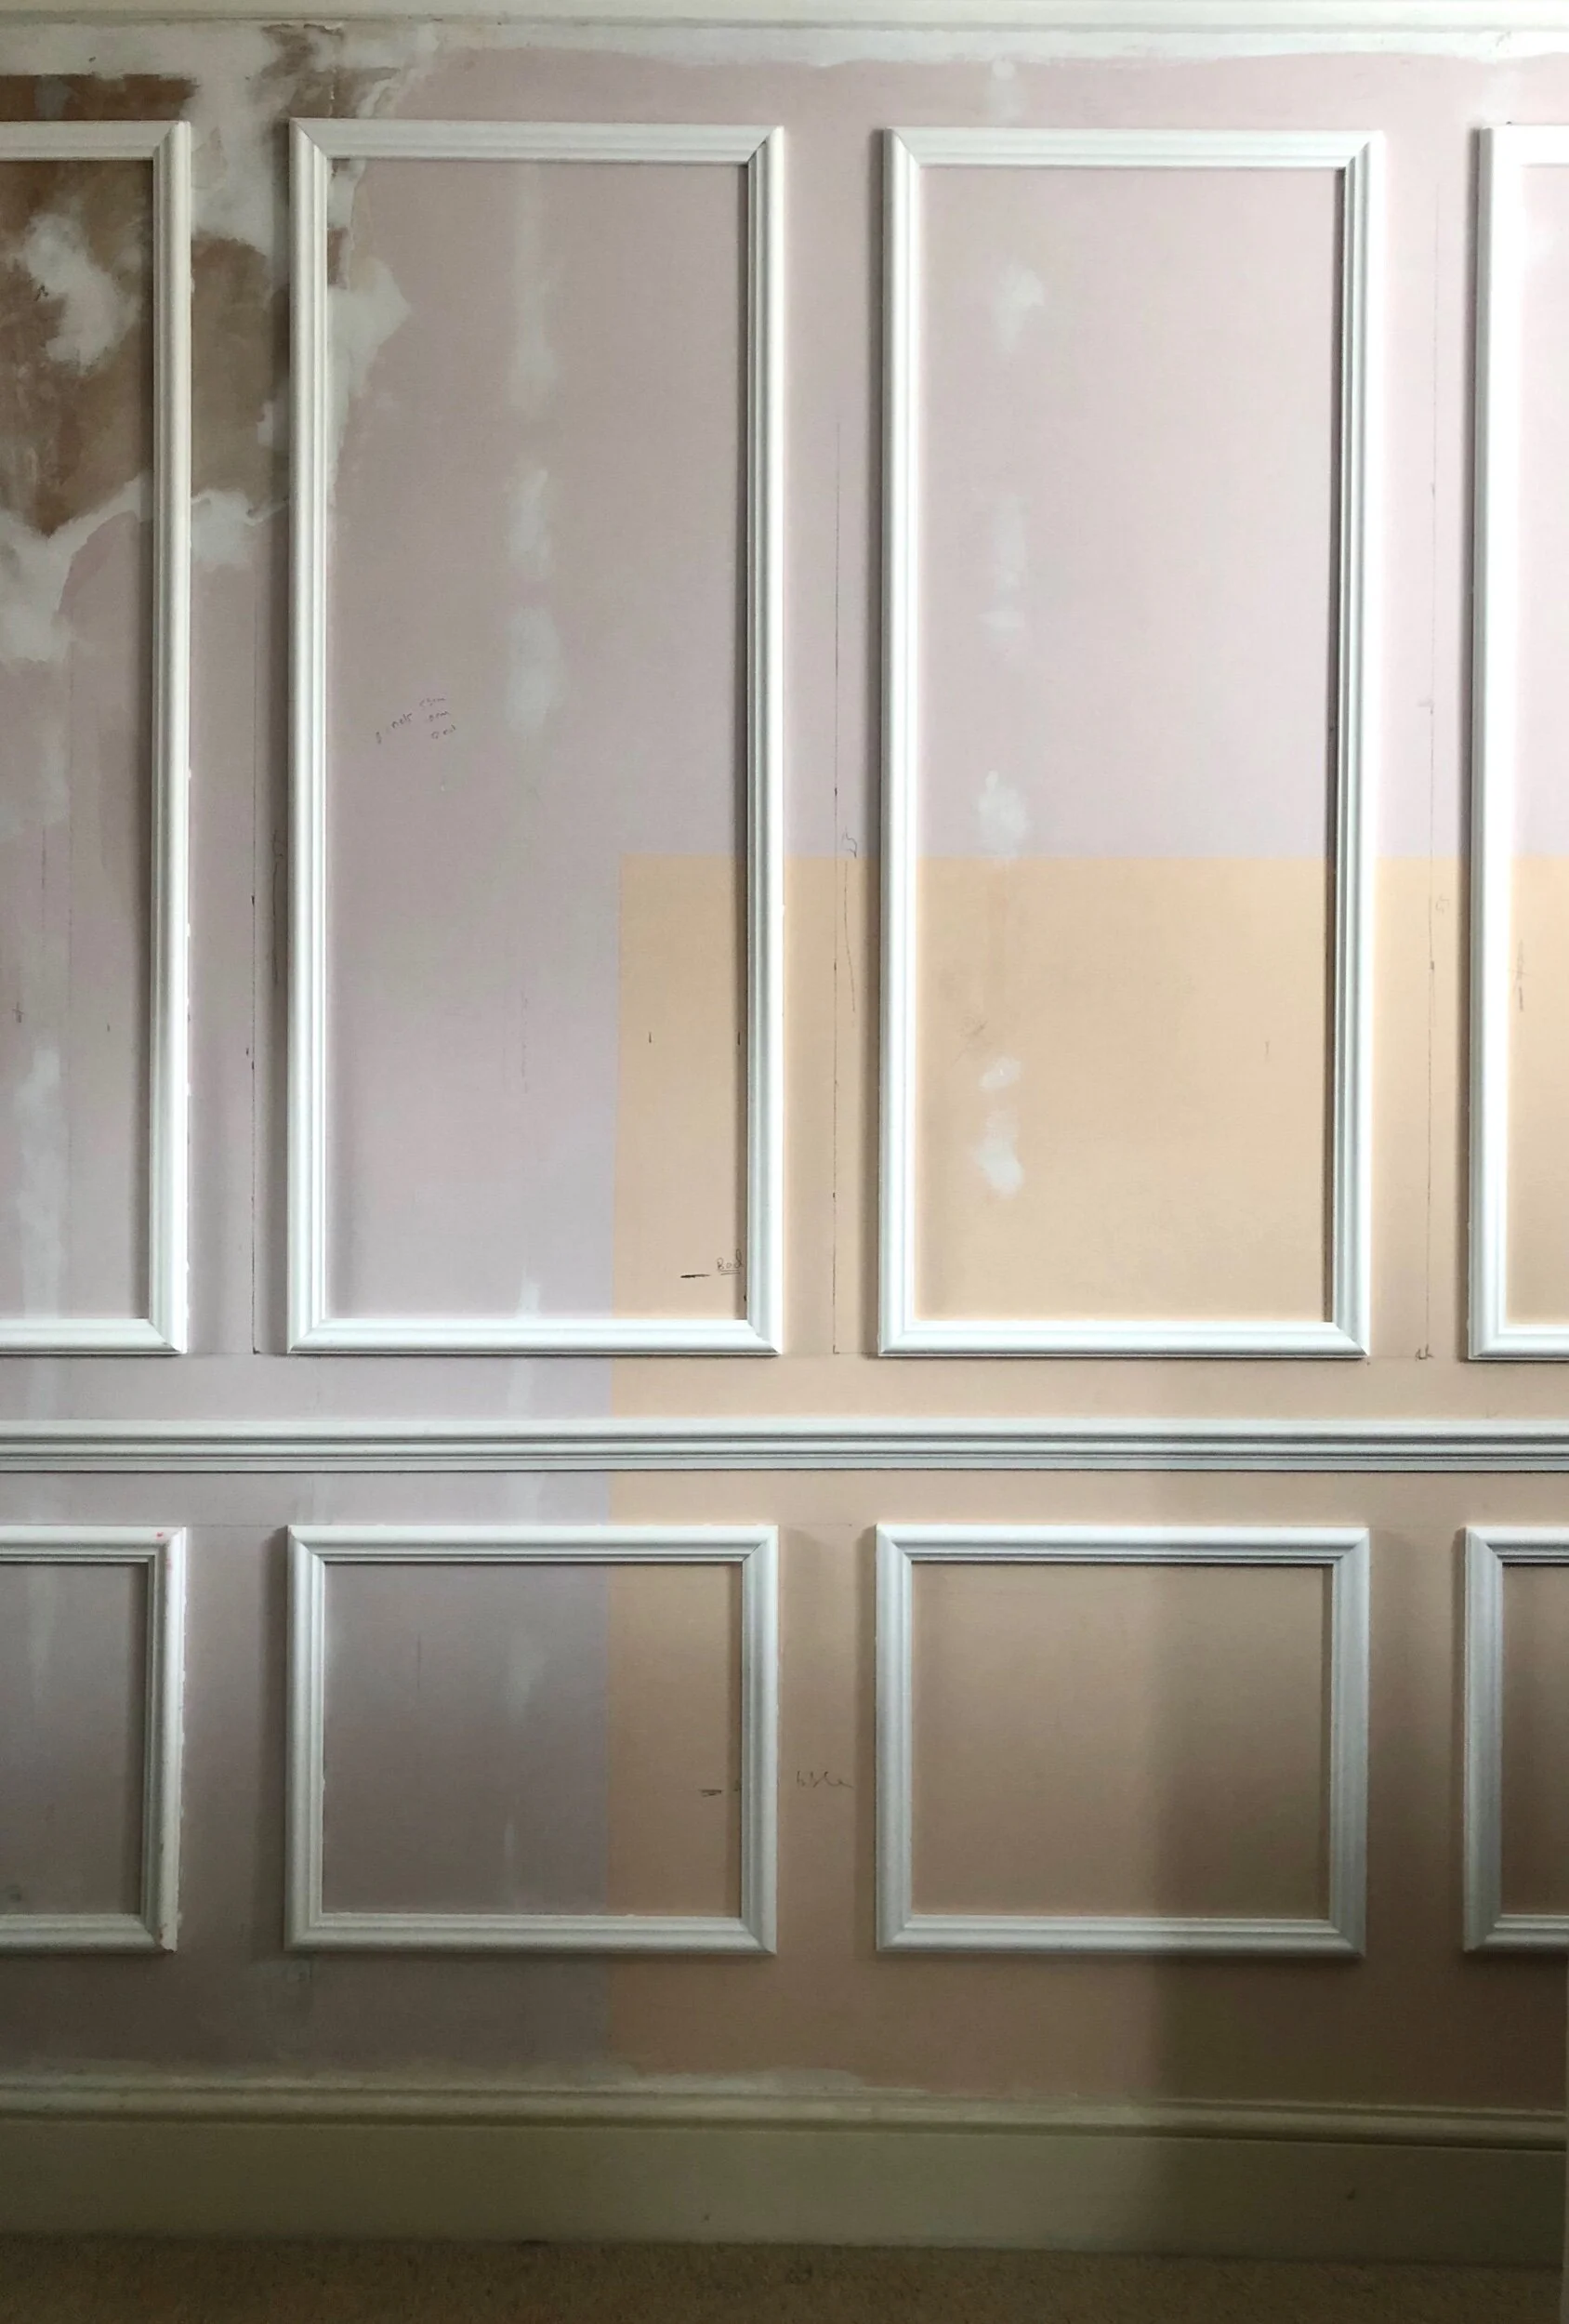
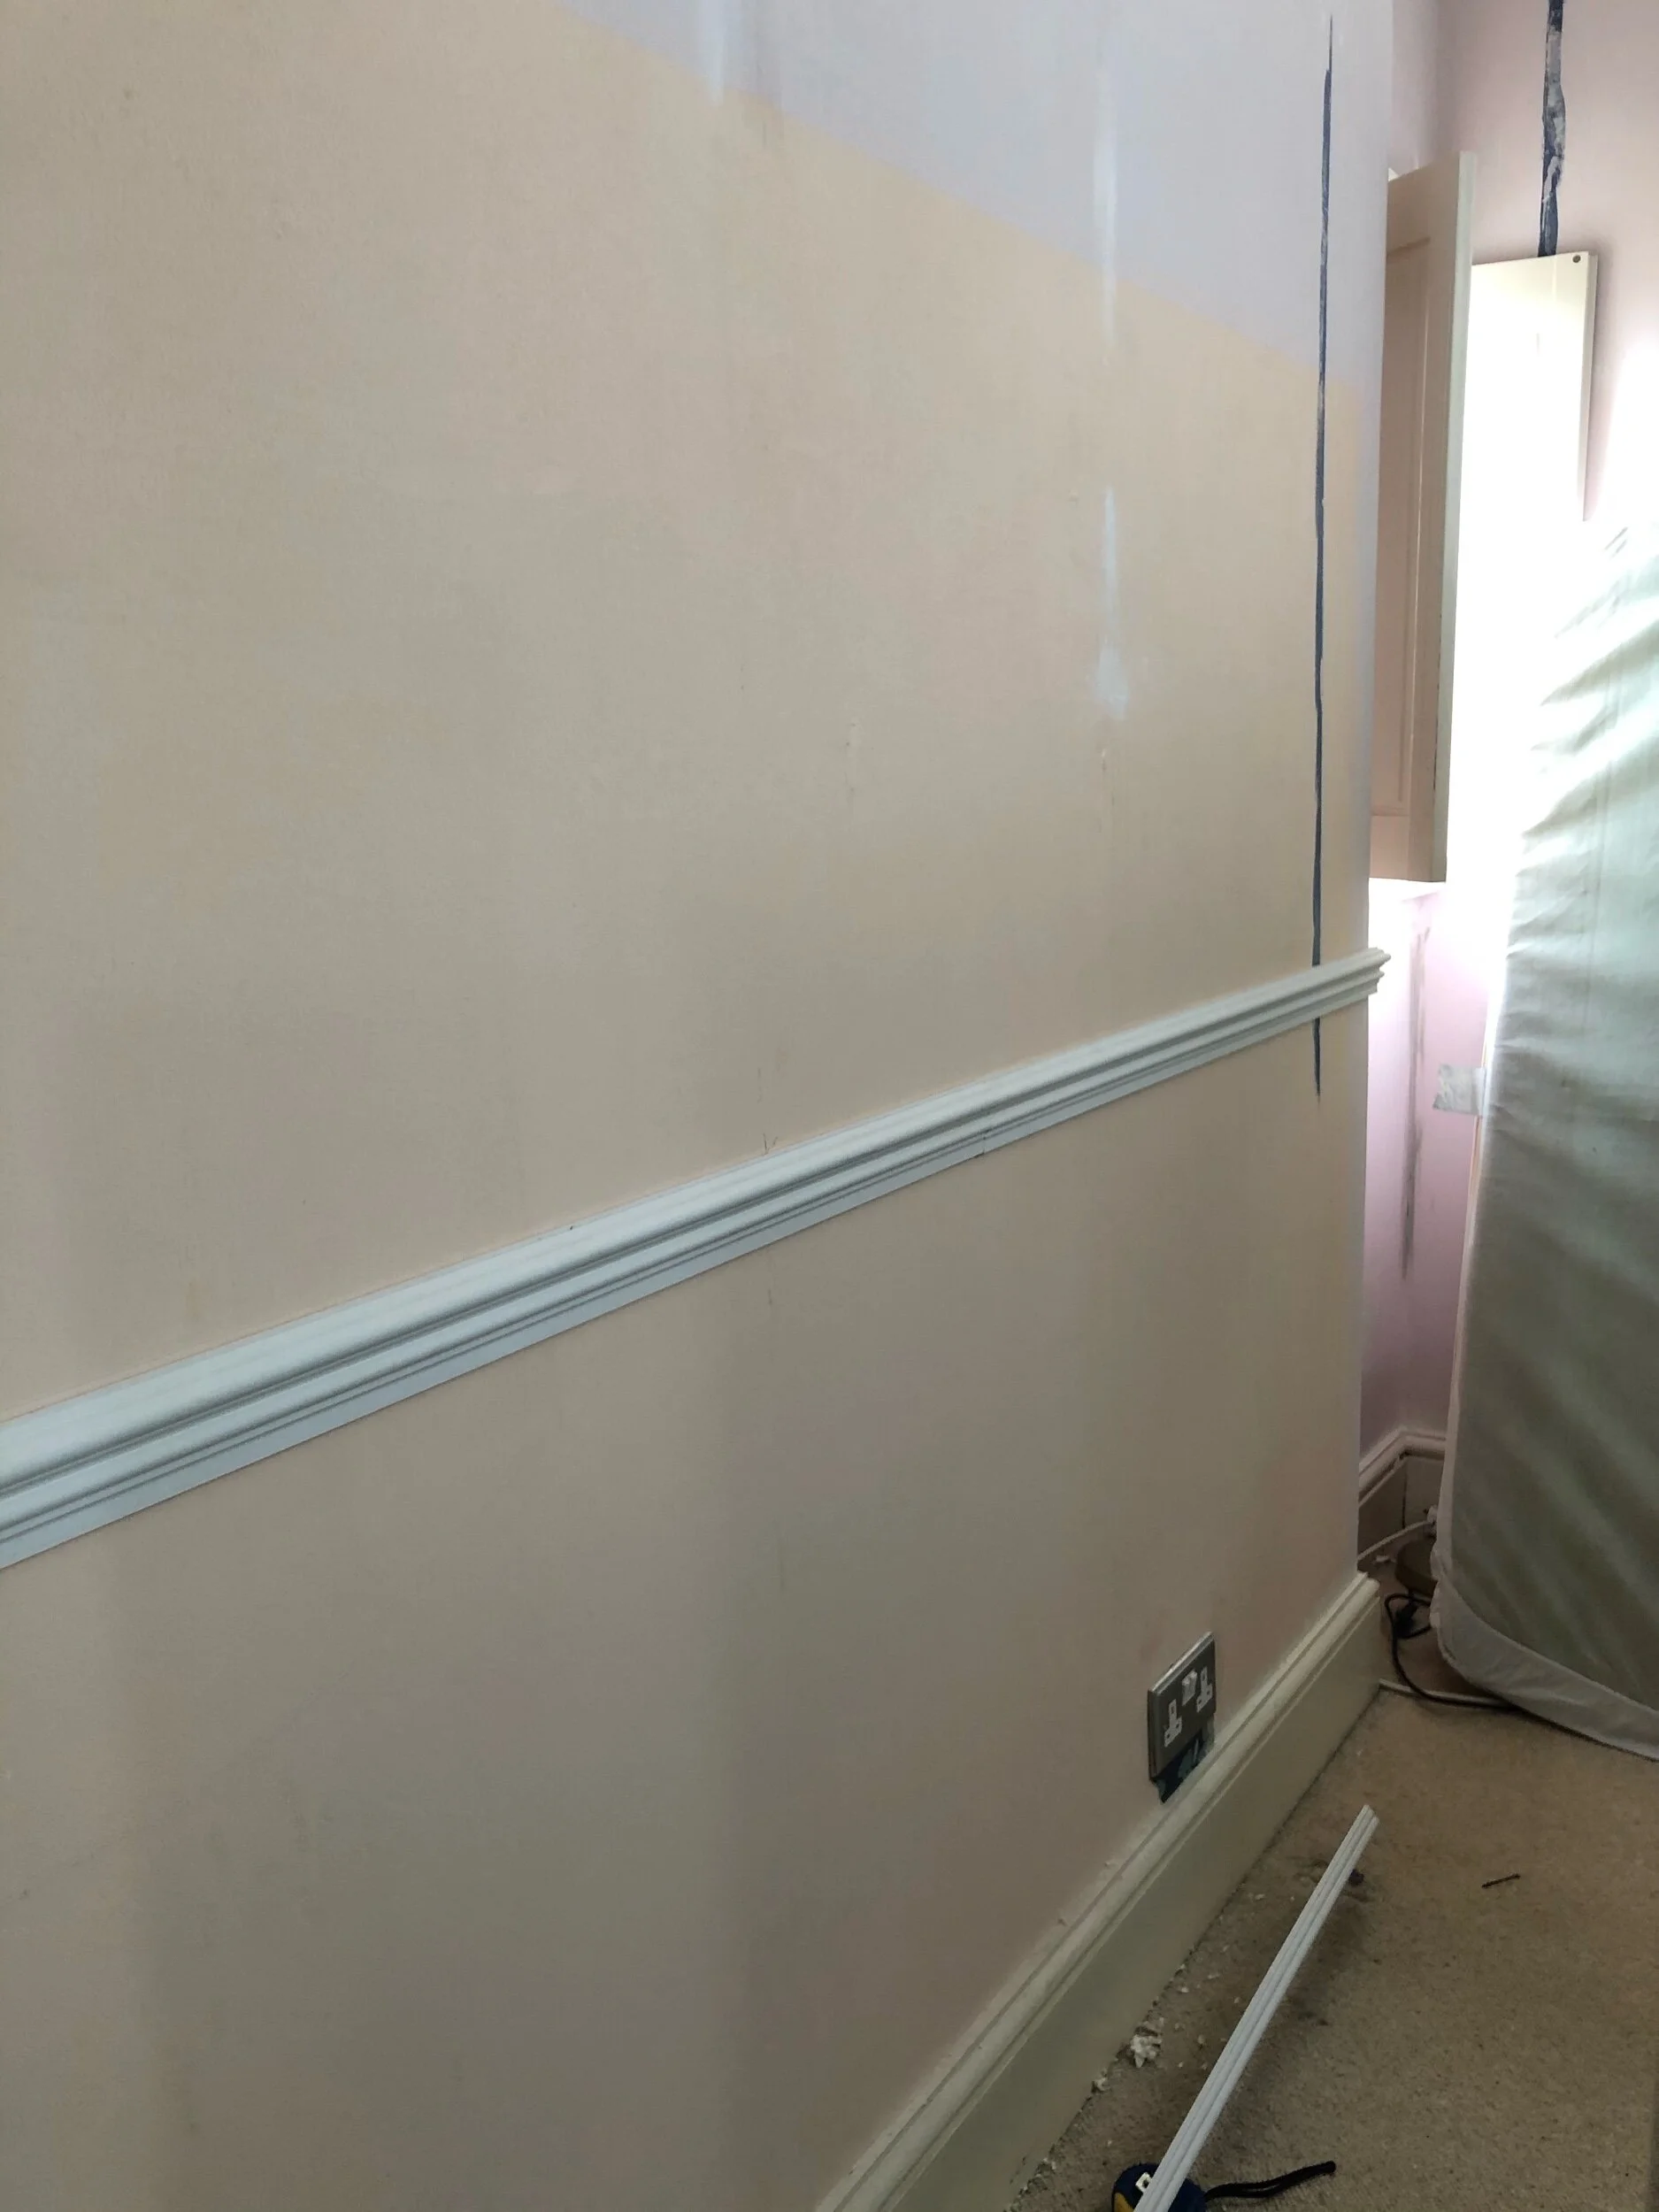
Once both your dado and all your panels are up and you’ve left enough time for the adhesive to set, it is important to caulk all around the inside and outside of each panel so that the panels blend into the walls and you cannot see any gaps and joins.
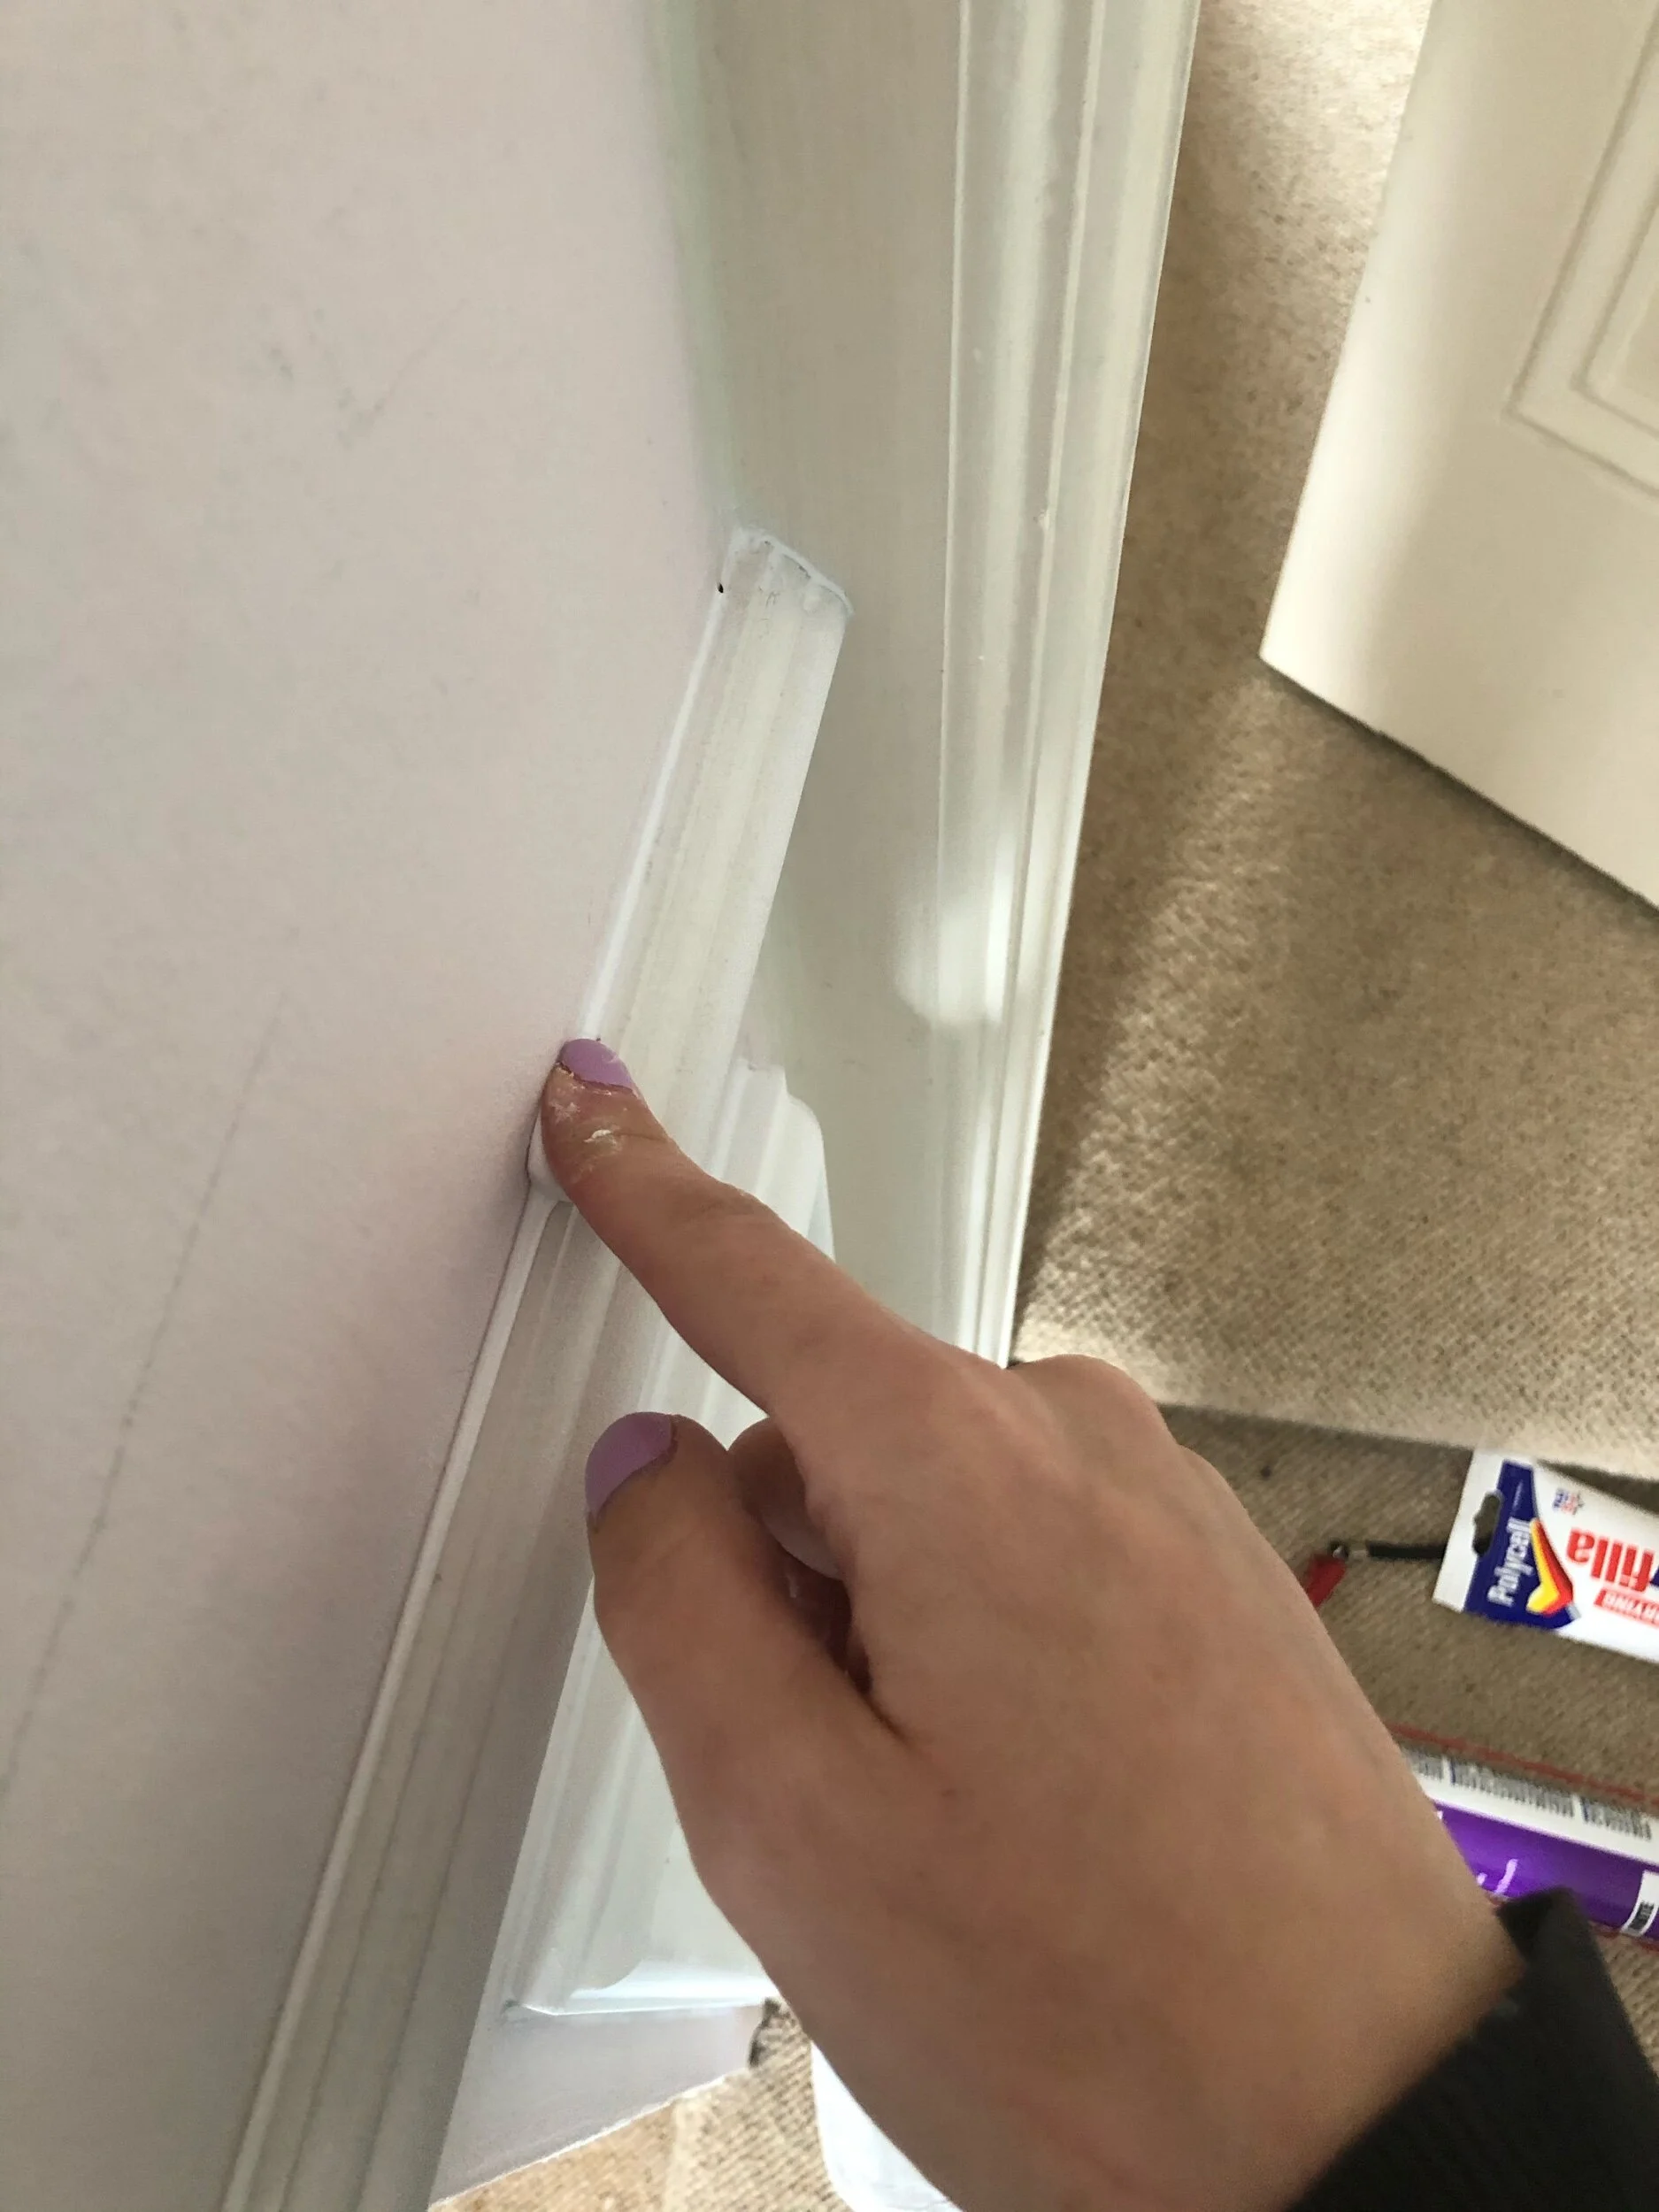
Caulk any gaps and joins for a professional finish.
Using some good quality caulk in a caulking gun, apply a thin strip of caulk between the panel piece and the wall. Then, you can either use a damp sponge or your finger dipped in water to smooth down the caulk, wiping away the excess.
It is also important to caulk and fill the joins where your cut angle edges meet. Simply fill, wait to dry, then lightly sand with some sandpaper. Repeat this until the joins have vanished.
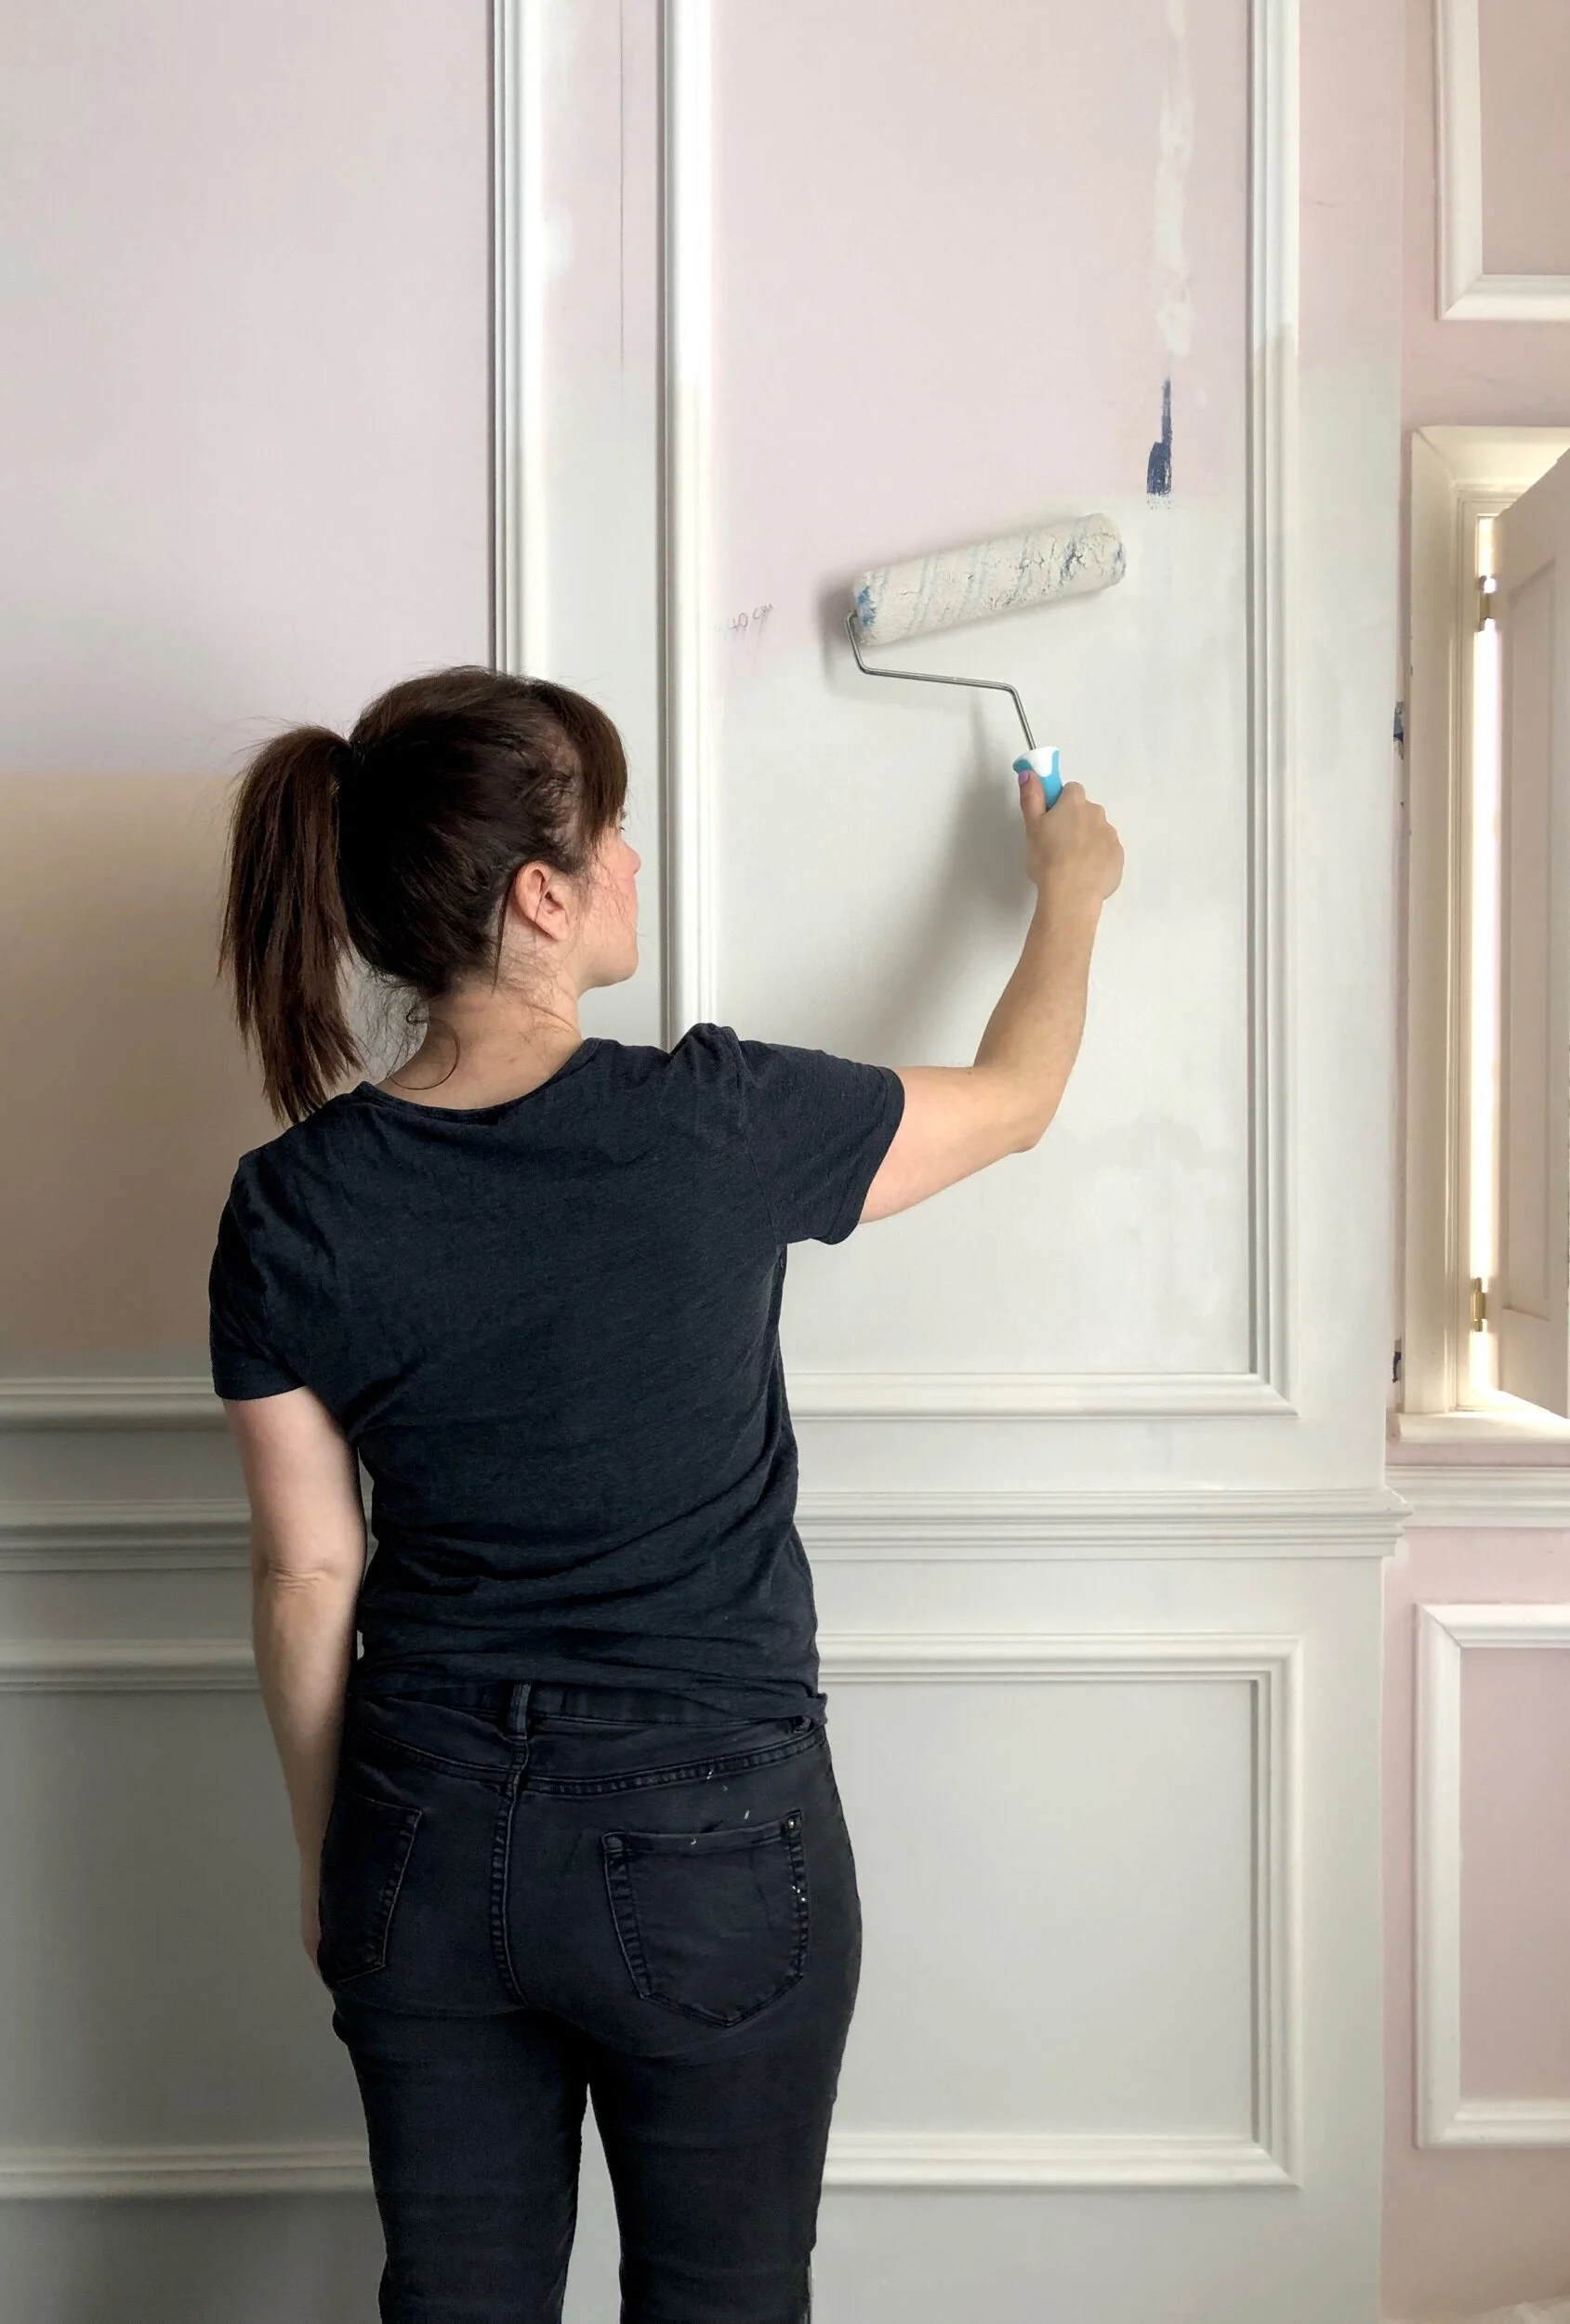
Once everything is dry you can paint! (if you’ve used bare wood or MDF then you’ll need to prime first.) I used a mix of mini emulsion rollers and angled paint brushes to get thorough paint coverage.
For a full video on how I created this wall panelling project in my bedroom, head on over to my IGTV (and please do give me a ‘like’ and a follow!)